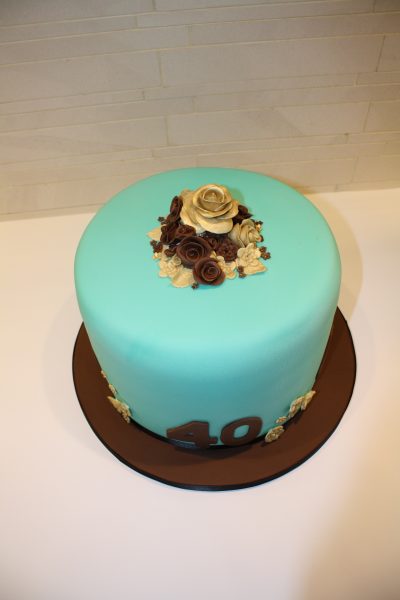
This is my friend Emma. Have I mentioned that in my adult life I am surrounded by Emmas? This Emma is a mum from Beau’s year but in Darcey there are three of us Emma Mums. When I used to work at Woman and Home magazine there were 6 working in the office at one time – with freelancers! That’s where the EmmaMT comes from. How else do you distinguish between us all!
Anyway back to the cake! This is probably one of the biggest cakes I’ve made. I mean, I’ve stacked cakes before but for one cake this is the biggest. I learnt quite a few lessons making it too, so I thought I would share my top tips with you.
1. Bake one cake at a time
Making up one 8″ Madeira cake mix for a 10″ tin will give a really great depth to each layer. I also discovered that if I bake each cake with a sheet of silicon paper loosely placed over the top of the tin the cake comes out completely flat. And I mean completely! No raised, cracked, doming and no excess to cut off.
I’ve since covered all my Madeira cakes with silicon paper whilst baking and they have all come out nice and flat. This makes me very happy!
2. Use a cake ruler to get the sides straight
Remember the side scraper I talked about last year? Well, that has become one of my most valuable tools. When it came to covering this cake in buttercream I did it in two stages so that I was sure it was straight. I used the side scraper on each 3/4 layers when I did the crumb coating but when it came to stacking all the cakes together the scraper wasn’t tall enough so, I used a pink cake ruler.
The cake ruler has one straight side and one serated (I must use that serated side for something one day!) It’s pretty sturdy for a piece of plastic and did a great job of making sure the whole cake was smooth and the sides were at a 90º angle. I simply added a thin layer of buttercream to the crumb coating then stood the ruler along the side of the cake and carefully scraped around the side and voila! One tall covered cake!
n.b. I had to remove a shelf in my fridge to get the cake in to chill the buttercream!
3. You can have any colour cake
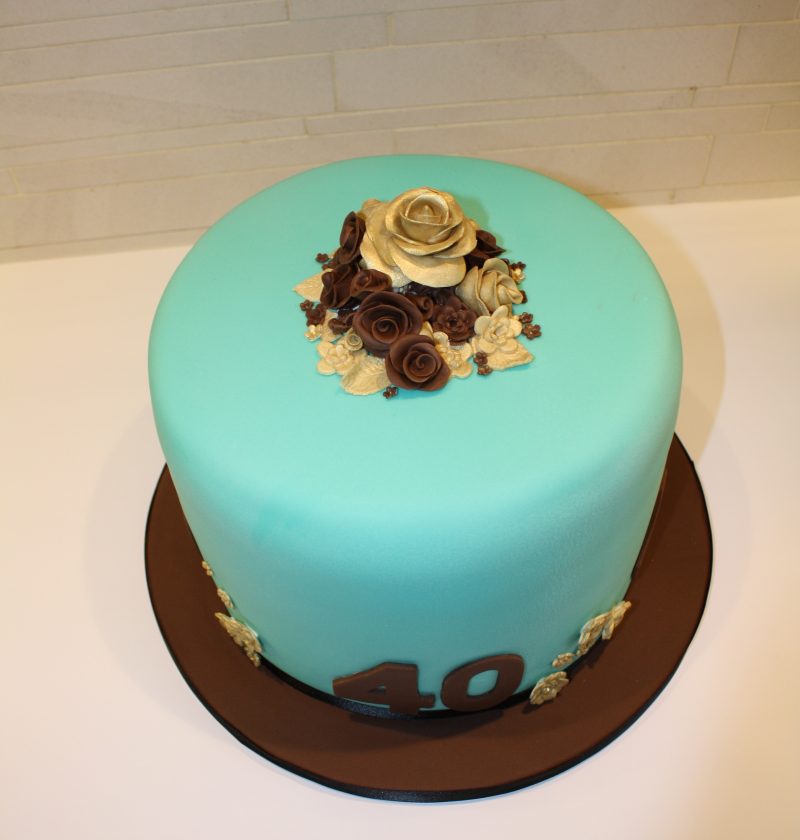
I played around with getting the icing for this cake the right colour. Emma showed me her colour scheme and I had a drop of her nail varnish for the big night to match it to. That was a first! Teal is a pretty difficult color to match and I had nightmares that when I delivered the cake I was going to find that it was too dark/ too green/ or just plain wrong – but in the end it was perfect! I mixed food colours in turquoise and mint green to get the end result.
When mixing up a strong shade like this it’s a good idea to colour your sugarpaste ahead. Not only will you know you’re happy with the colour, but if you colour the sugarpaste the day before you cover your cake it will be less sticky and more steadfast- or in other words your hands won’t go teal!
Another top tip is to make sure your sugarpaste is pretty thick when you roll it out so when you lift it over the cake any stretching will be hidden and won’t result in a tear. It also means that you’ll be able to smooth it really easily.
4. You can make really gold flowers
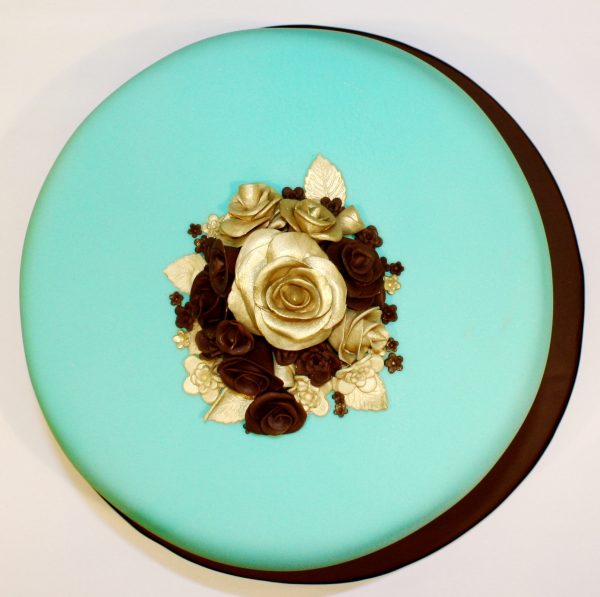
These were the first gold flowers I had ever made and I was a little concerned that I wouldn’t be able to get such a shiny, lustre result. The way I did it was by colouring my white modeling paste in Autumn leaf food colouring paste. I then made the flowers and used a gold lustre powder mixed with a little rejeunvanator liquid and painted them all over. I also painted my fingers and most of my kitchen table! Once dry the roses were just as I wanted them. When wet they were a sticky mess that makes everything go gold! So you have been warned. Put the flowers somewhere where you can paint them and move them without actually having to touch them.
I left them to dry overnight.
5. Don’t overstack the cakes!
I made these layers individually, colouring the cake mix before it went into the oven. Then I made sure that each layer was the same depth. The trouble is that cakes are quite heavy and sugarpaste is REALLY heavy so the cakes on the bottom levels became a little compacted. It didn’t effect the taste – just the look.
Next time I will add a thin board inbetween the middle layers with dowels to hold the weight of the top layers. That way they won’t get squished!
So that’s my top tips with this tall rainbow cake. If you have any tips then please leave me a comment below and let me know how you decorate cake. Every little tip makes the decorating so much more fun. and it’s great to share the knowledge, don’t you think?
EmmaMT
More Bakes you may enjoy
Chocolate cupcakes recipe with cherry goodness


A. MA. ZING. Great job! And brilliant tips! I absolutely love it, teal and chocolate are such great colour combinations.
I’m also totally in awe of how straight and neat it is. Is that just because they are madiera cakes and hence quite sturdy?
No it’s all trick photography!!! Not realy. I worked really hard to get this cake as straight as possible. I did two coats of buttercream and popped the cake in the fridge to go hard for 20 minutes before I covered it. Then I smoothed and smoothed and smoothed.
I think the fact that it is a really sturdy Madeira cake probably helps.
What is silicone paper?!
Hello,
Silicon paper is a type of baking paper but it is more slippery and much more non-stick. I get mine from Lakeland as they do fantastically long rolls and it seems to last ages
http://www.lakeland.co.uk/5512/30cm-x-45m-Baking-Parchment-Roll-
I haven’t seen it in the supermarkets but I am sure it’s just a matter of time.
EmmaMT
Love it. I made a really deep one for a client and she didn’t know how to cut through it ! They are really impressive love the colour combination and your tablecloth too!
I know what you mean. Emma didn’t know where to start when cutting it either. I love it when people don’t want to ruin a cake by cutting it.
EmmaMT
Lovely cake. Great post. You are a great teacher and I appreciate the lessons and information on the supplies necessary to obtain professional results.
Ah thanks for taking the time to comment and say that. That makes my day. x
the cake looks incredible and elegant, I’m totally in love with it ^^
Thank you Emma, am a baking enthusiast. I make great cakes, my husband asks me if it is my skills or my kenwood that makes it great. I love beautifully decorated cakes and pay so much for my family occassions but you have inspired me to make and decorate my daughter’s birthday cake. I will let you know how it pans out.
Hello,
Thanks so much for your lovely comment. I am sure it’s you who makes the fab cakes. The Kenwood after all is just a mixing machine! Good luck with your daughter’s cake. I’d love to see how you get on. Pop a pic on the CakesBakesAndCookies.com Facebook page if you want to share your creation.
Good luck
EmmaMT
Hi!Help,Im so confused!am planning to make my daughters first birthday cake and got so muddled while looking at cake tins,basically Im planning on making a madeira(using your recipe),I want to cover it with fondant and figures etc on top.I wanted to have 2 layers of cake with buttercream in the middle.I bought a 9 inch diameter cake tin,is this the right size?Your recipe is for 8 inch isn’t it?I don’t know what to do as Im worried the cakes will come out very small,I want it to a good height,help!?
Hello,
Don’t panic! You can see the ingredient quantities you need for a 9″ cake tin in this post here.
I hope that helps
EmmaMT
Hi how did you make the chocolate flowers?
Hello,
I used chocolate sugarpaste. I don’t think I’ve ever done a post on how to make them. I’ll add that to my list.
Basically you cut out circles of sugarpaste. Place them between two sheets of plastic (like those protectors you place in ring binders) press the edges of one side so that it gets thin. This is how you make each petal. Then roll the petal up to create the centre. Repeat with more circles adding each petal onto the centre curving each petal outwards as you go. Keep going until you have the right size rose you desire.
I hope that helps. I’ll have to take some pics when I make them next. I think it’s easier to explain with photos.
EmmaMT