On Thursday it was Darcey’s birthday and what with one thing and another I had to make her cake in one evening! The day before I had finished off decorating a friends wedding cake which had to be driven to Poland. Can you imagine how stressful it is to make a friends wedding cake let alone make sure that it can survive a 12 hour drive! I was mega stressed out to say the least. I boxed it all up in double boxes. Loads of brown tape and tissue paper so it couldn’t move. The poor bride only got to see photos of it as I wanted to make sure it was really safe and bump/ swerve/brake proof.
I learnt a lot from that wedding cake including how to get the right ingredients for different size cake tins. (I’ll be sharing that with you soon). So I luckily had a 10″ cake that I didn’t use for the wedding cake sitting around. It wasn’t very deep, only 2″, so I decided to use it for Darcey’s cake and keep it simple and make her a ‘7’. To be honest I was too shattered to do anything else – even though Tim said I should make her a Mike from Monsters University. Finishing decorating at 1am, 1am and 2am for the last three nights in a row was too much me!
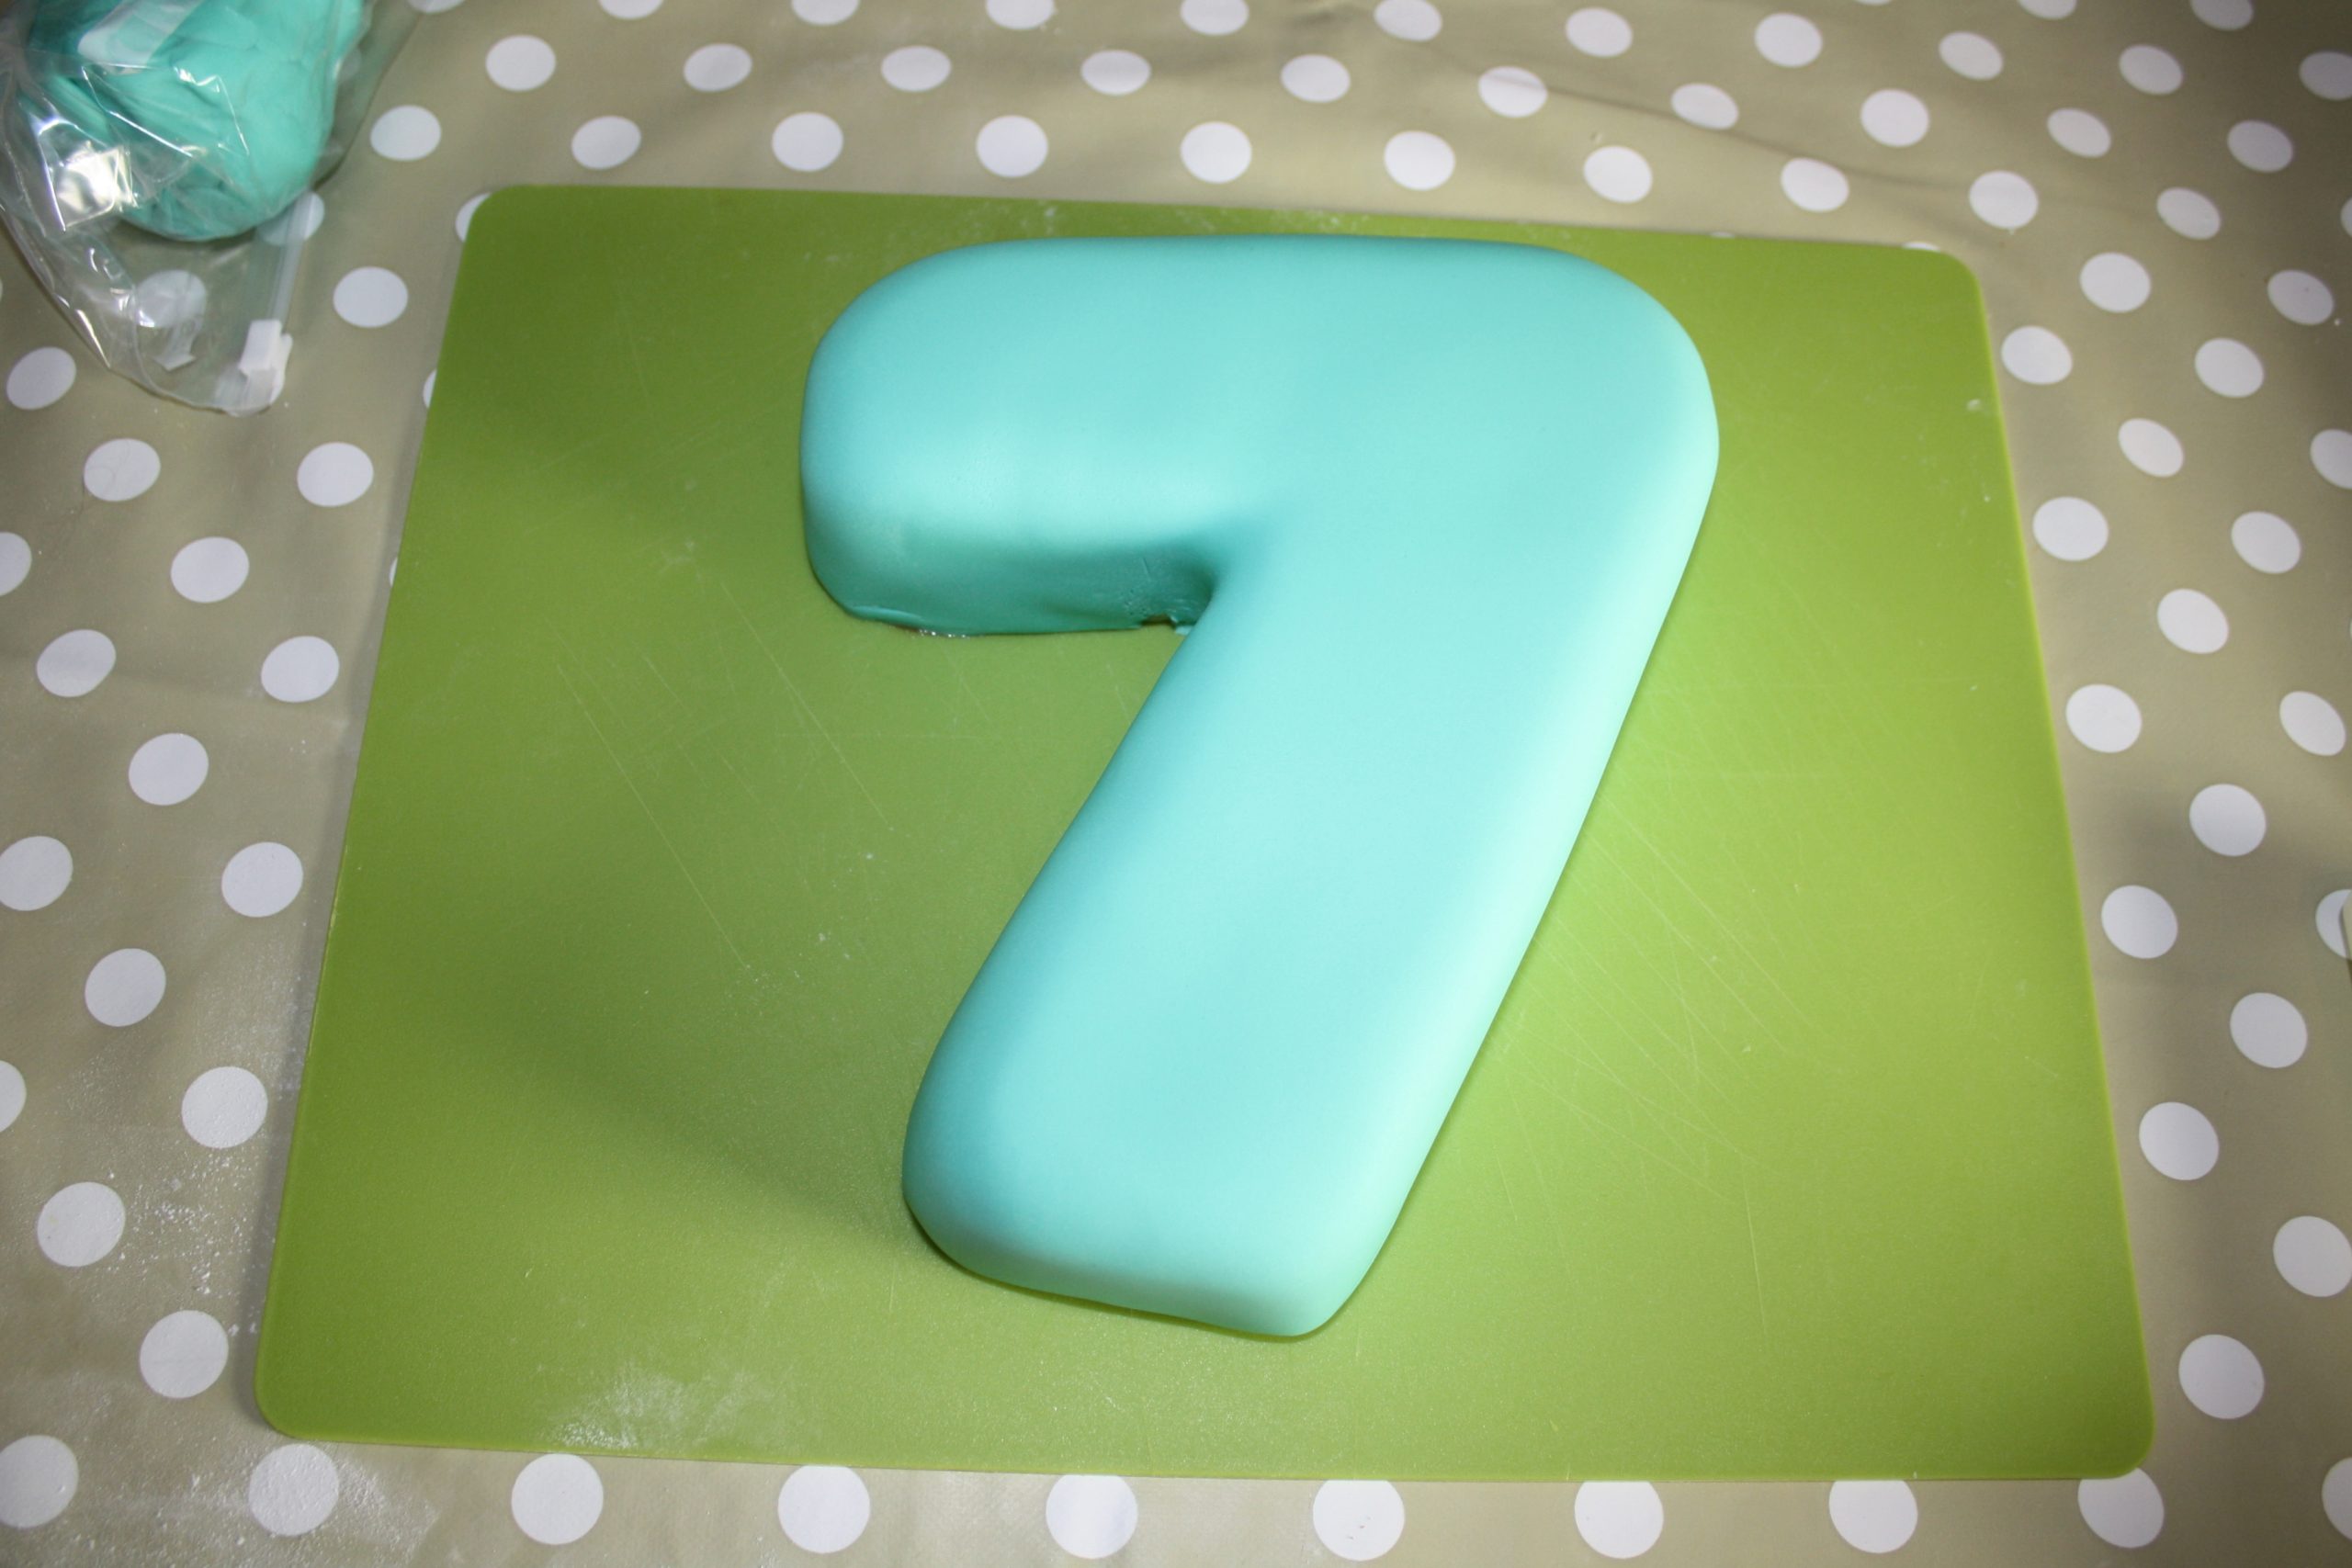
How to make a number 7 cake
My girls are pretty lucky. They get to celebrate their birthdays two or three times each year. Once on their birthday, once with the family and once with their friends at their birthday party. This cake was for just the four of us to take with to a birthday dinner meal so it wasn’t supposed to be that big but a 10″ cake!!! I couldn’t resist.
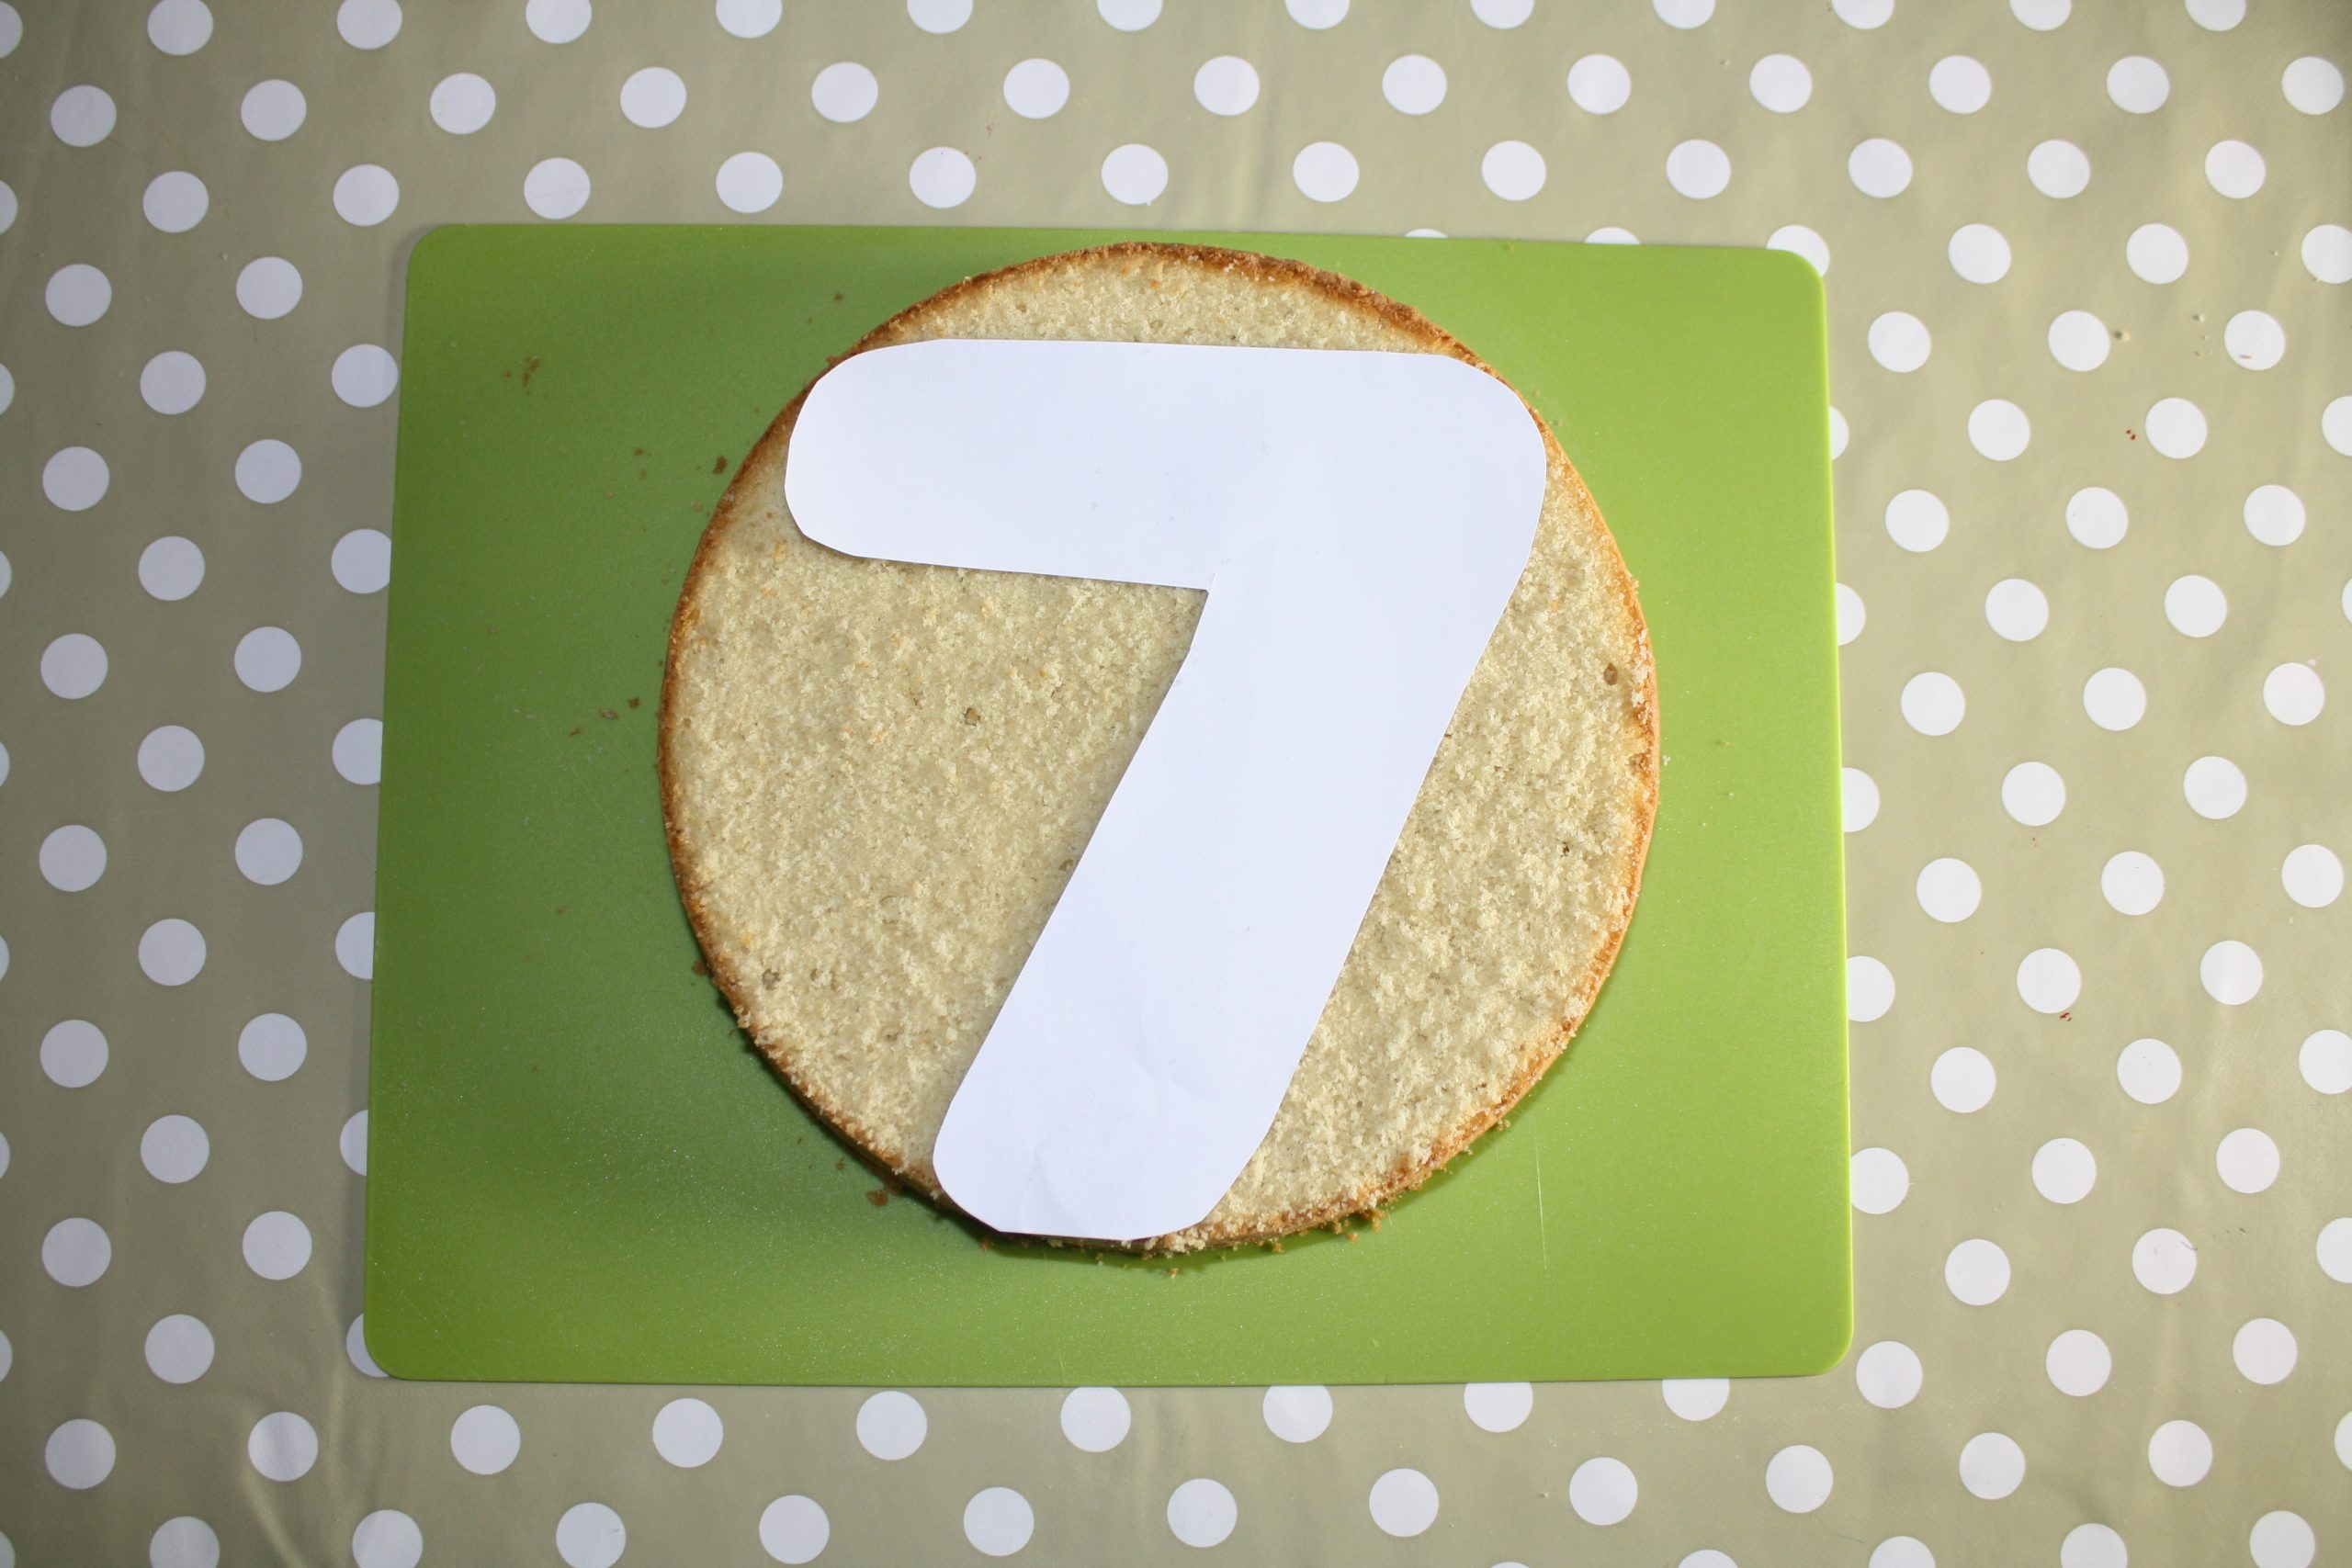
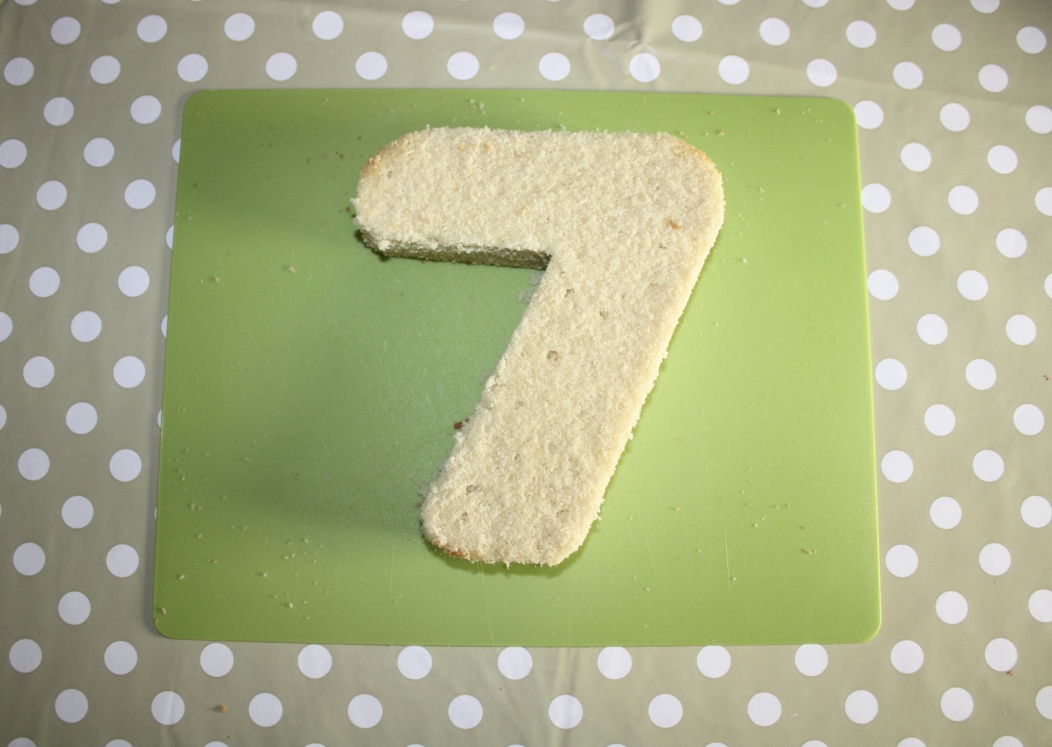
I started with a 10″ Madeira cake which I levelled off. I didn’t want to fill it with buttercream so I did what my mum always does with marzipan (see below) I cut out a piece of paper to the same size as the cake then cut it into a ‘7’ template.
Carefully I cut out the shape making sure that I kept the knife straight. I smoothed the top corner edges with my fingers.
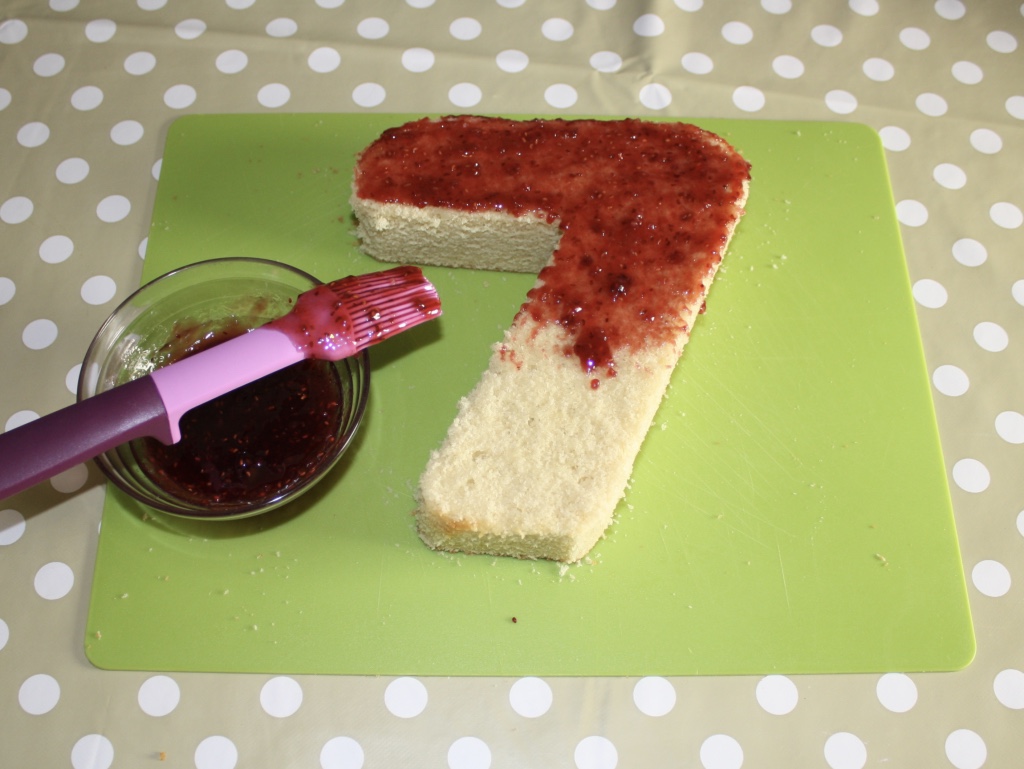
Next I heated up some raspberry jam in the microwave until it was runny and covered the whole cake with it. I was pretty annoyed that I picked up a jam with seeds in but it didn’t seem to matter. The cake then had to be left till the jam had cooled down.
The cake was covered in a layer of marzipan. This is how my mum covers her birthday cakes. The combination on jam, marzipan and finally icing is just perfect. Most people want a layer of buttercream but we aren’t keen on it so much. The family tradition is much better!
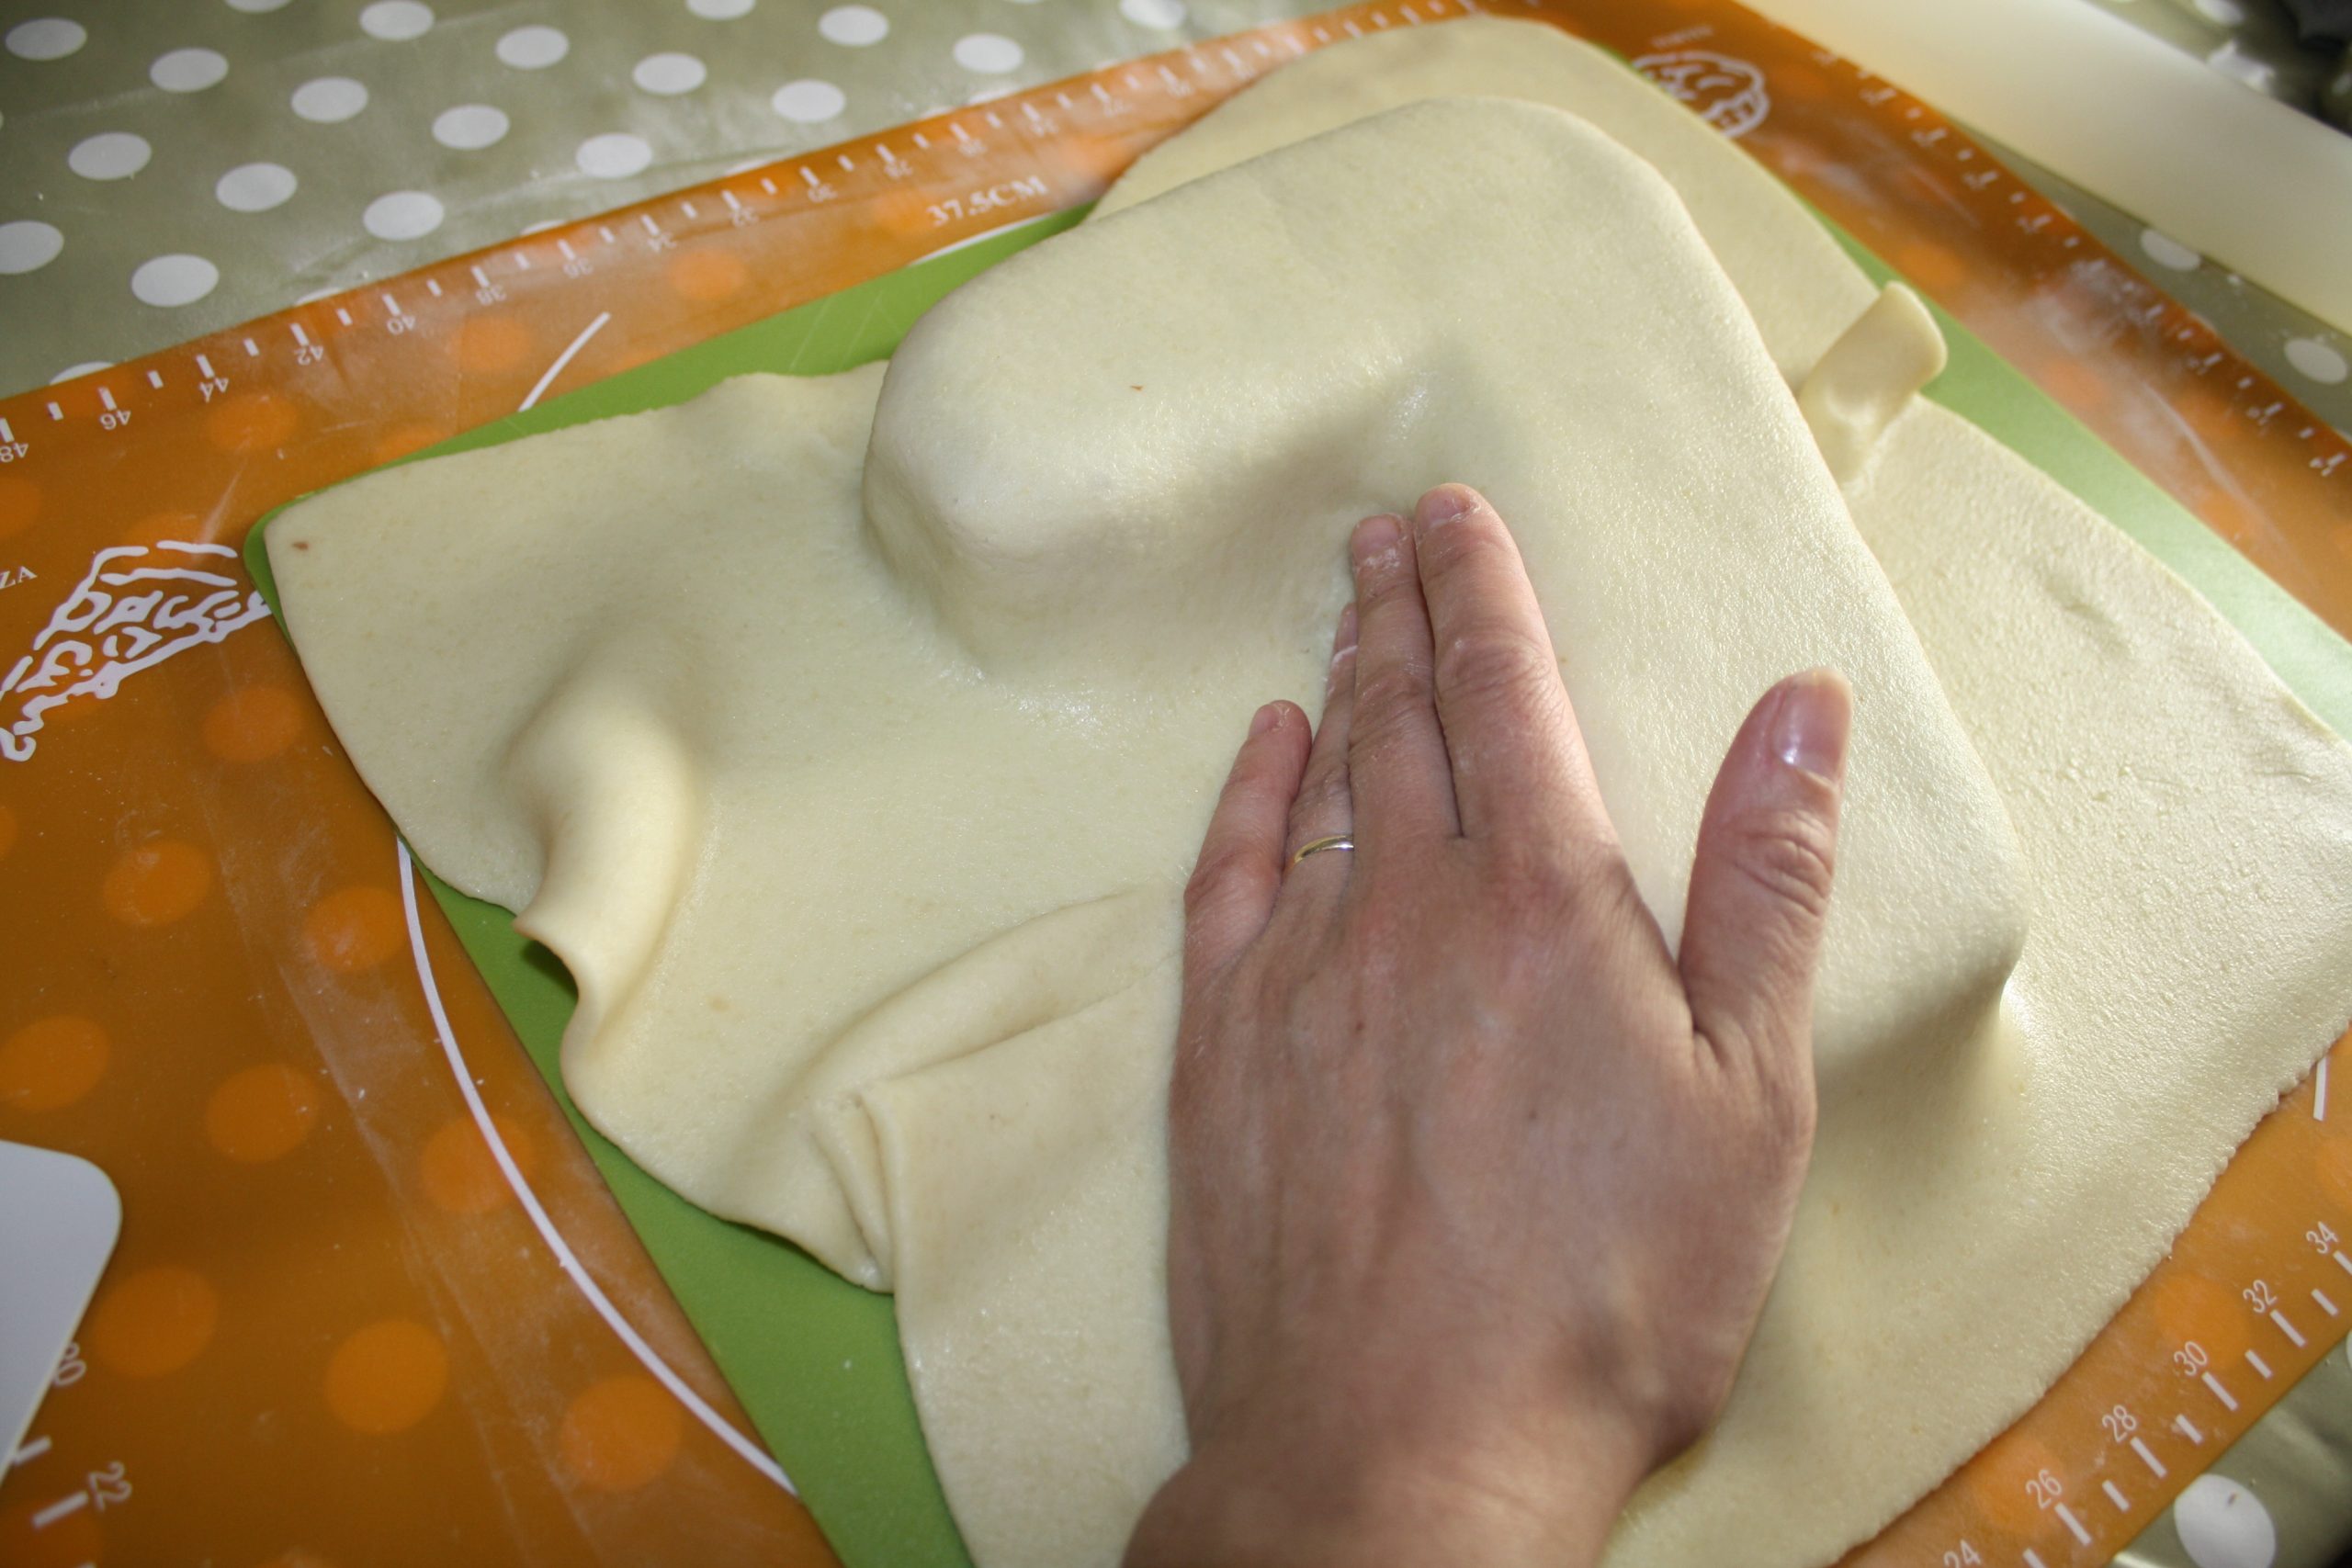
The marzipan is rolled out between two spacers then is laid over the jam covered cake. It’s important not to let the marzipan get too thin as you wont have enough scope to ease it into the nooks and crannies of the shaped cake.
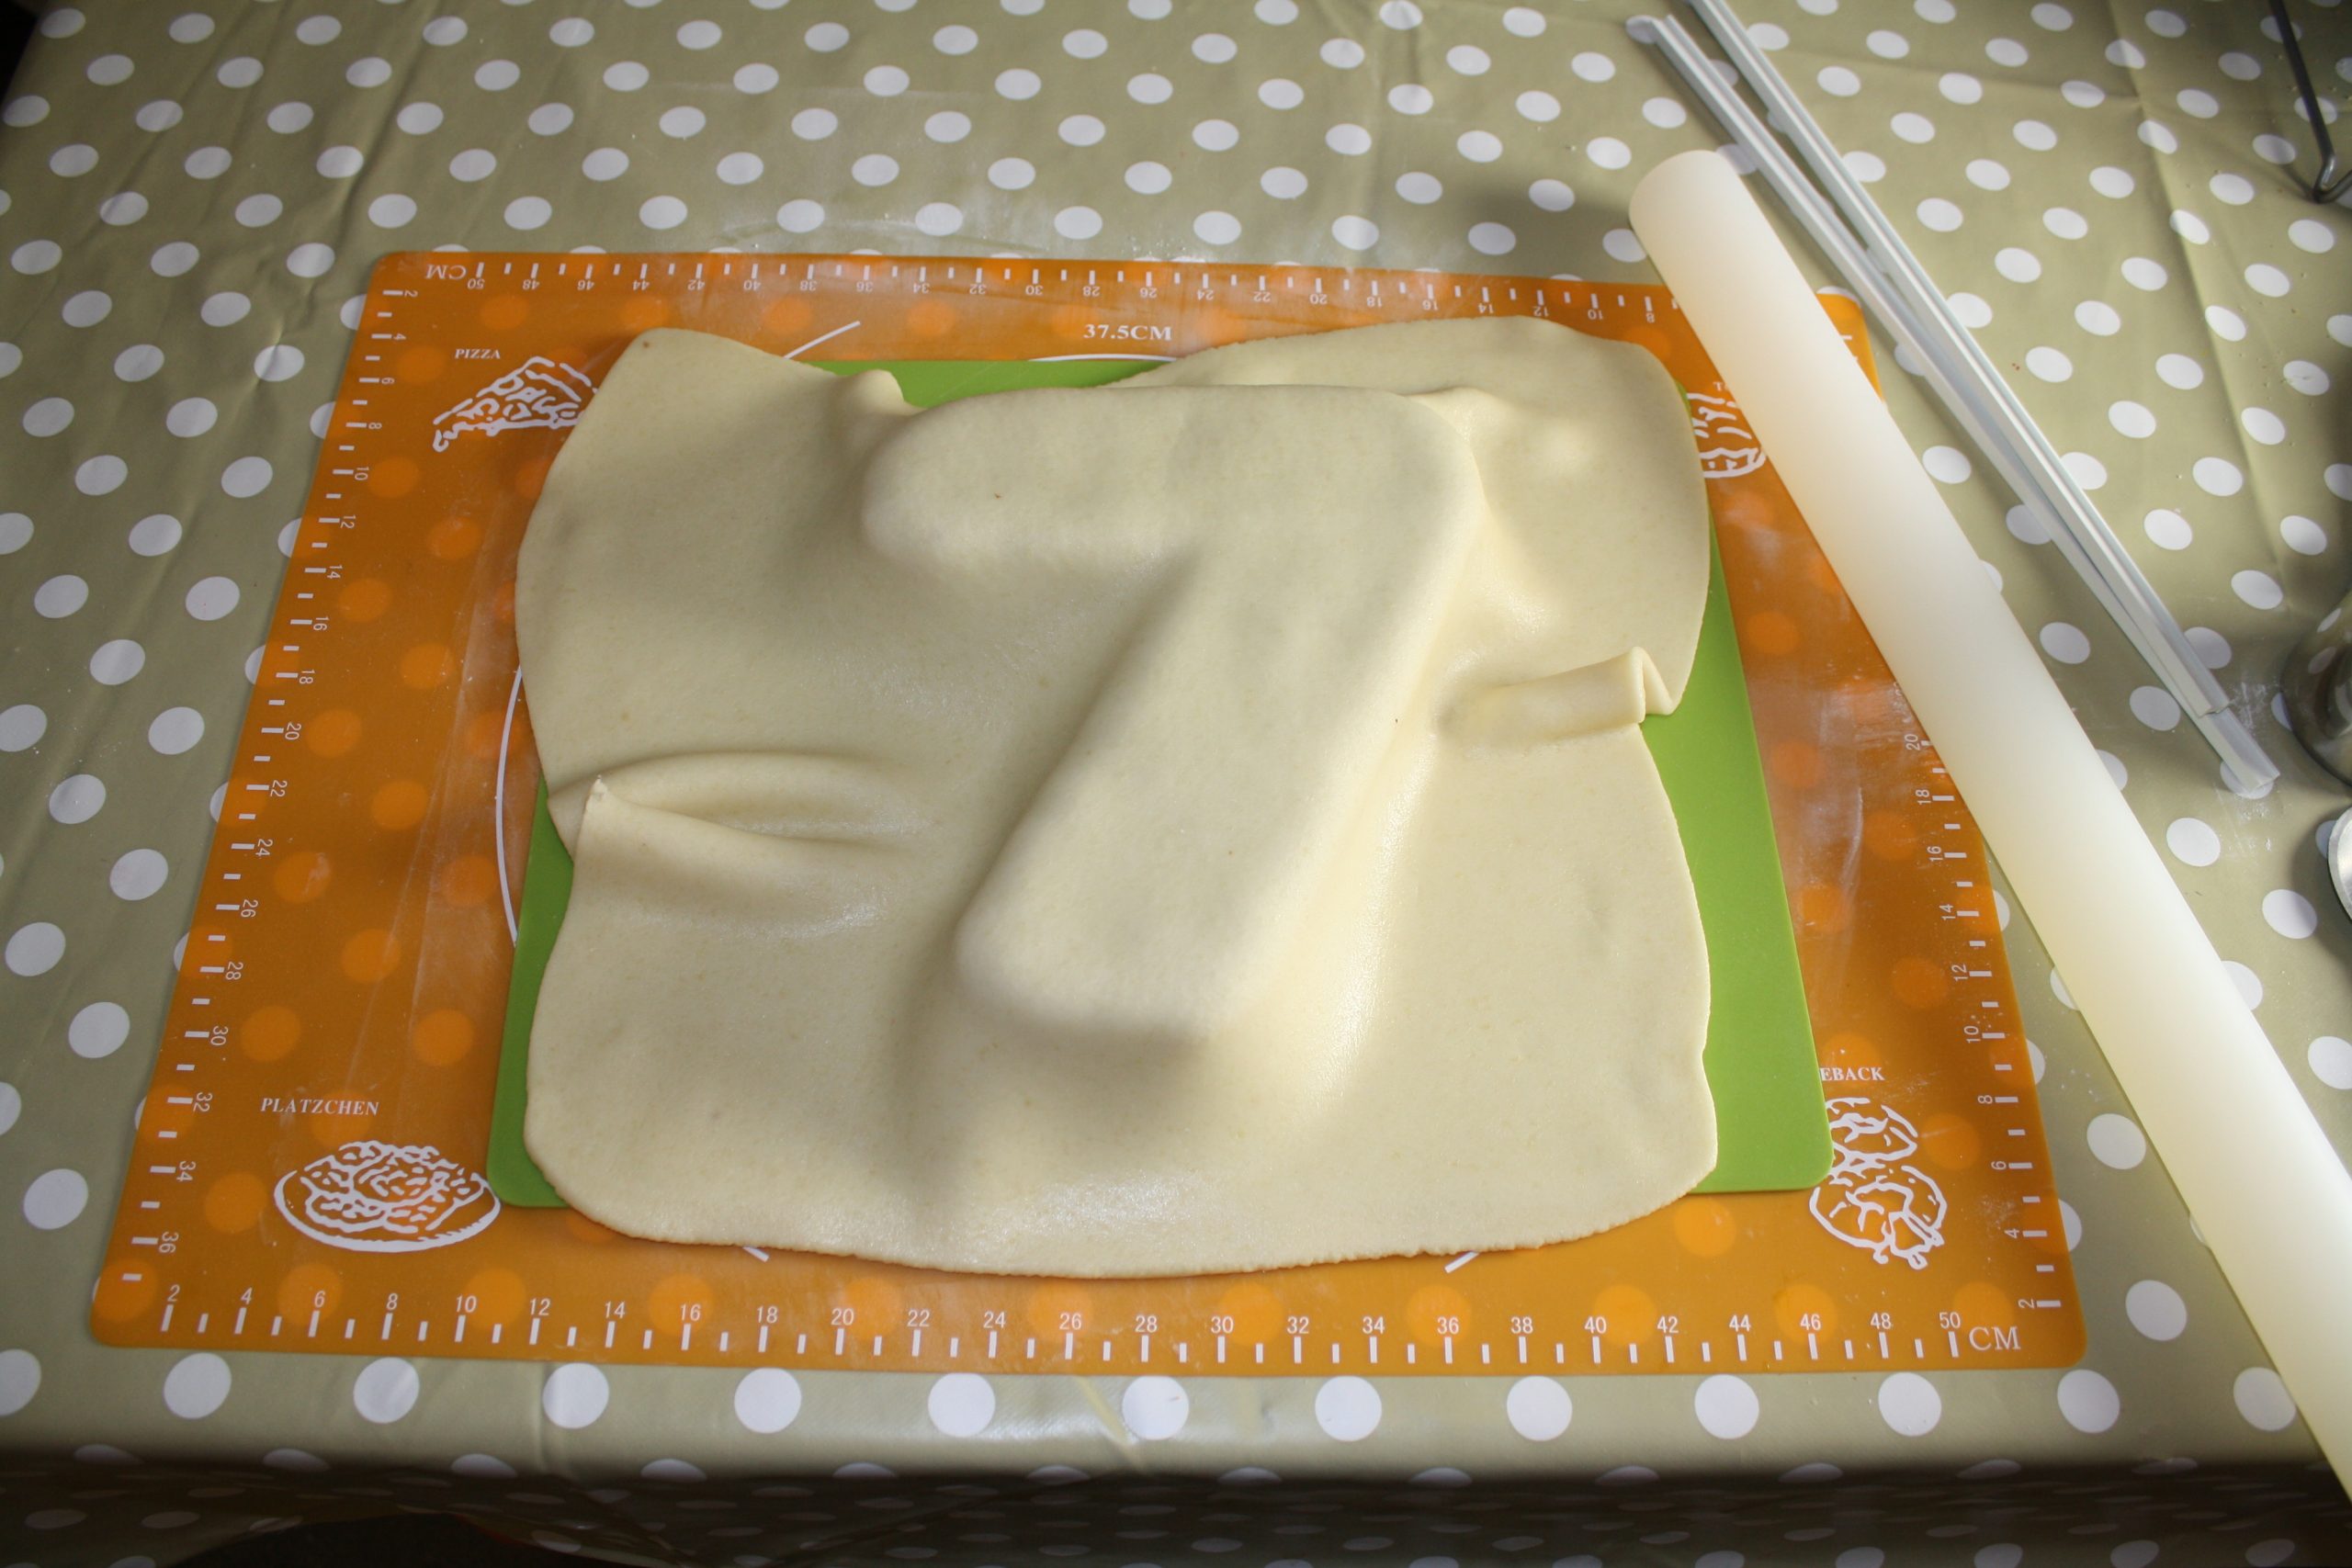
Smooth the top first, then work your way around the edges. I use my hands to get it all in place before I use a smoother. Marzipan is pretty sticky stuff so if you’re having difficulties lightly sprinkle icing sugar on your hands.
Gently ease the marzipan into the crook of the 7. This is where it can easily tear if you have rolled it out too thin. If it doesn’t feel like it will fit, lift up the excess that is on the flat in front of the crook and gently move it inwards. This prevents the pulling action over the cake and uses up some of the excess that you will be cutting away anyway.
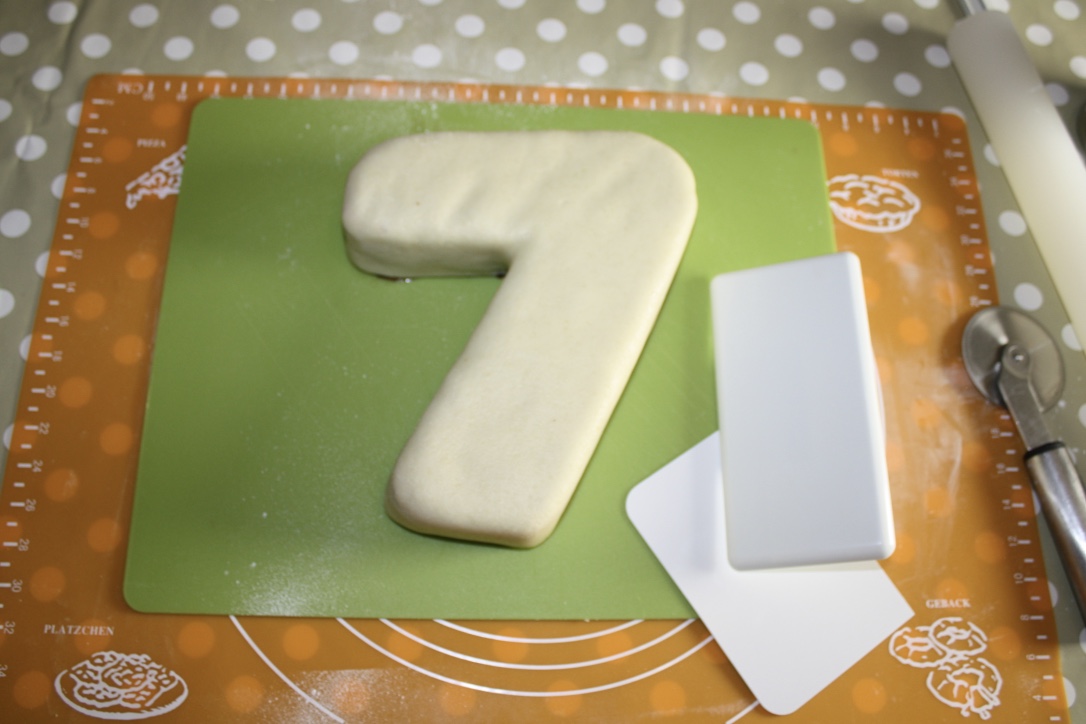
Make sure the marzipan is secured against the cake right down to the cake board.
Smooth with a smoother and remove the excess marzipan. Tuck any loose bits under the cake with a side scraper.
Now you need to repeat the whole process for the sugarpaste. Give your marzipaned cake a brush with cooled boiled water so that the sugarpaste will stick to it. Roll out the sugarpaste and place over the cake, smoothing as you did with the marzipan.
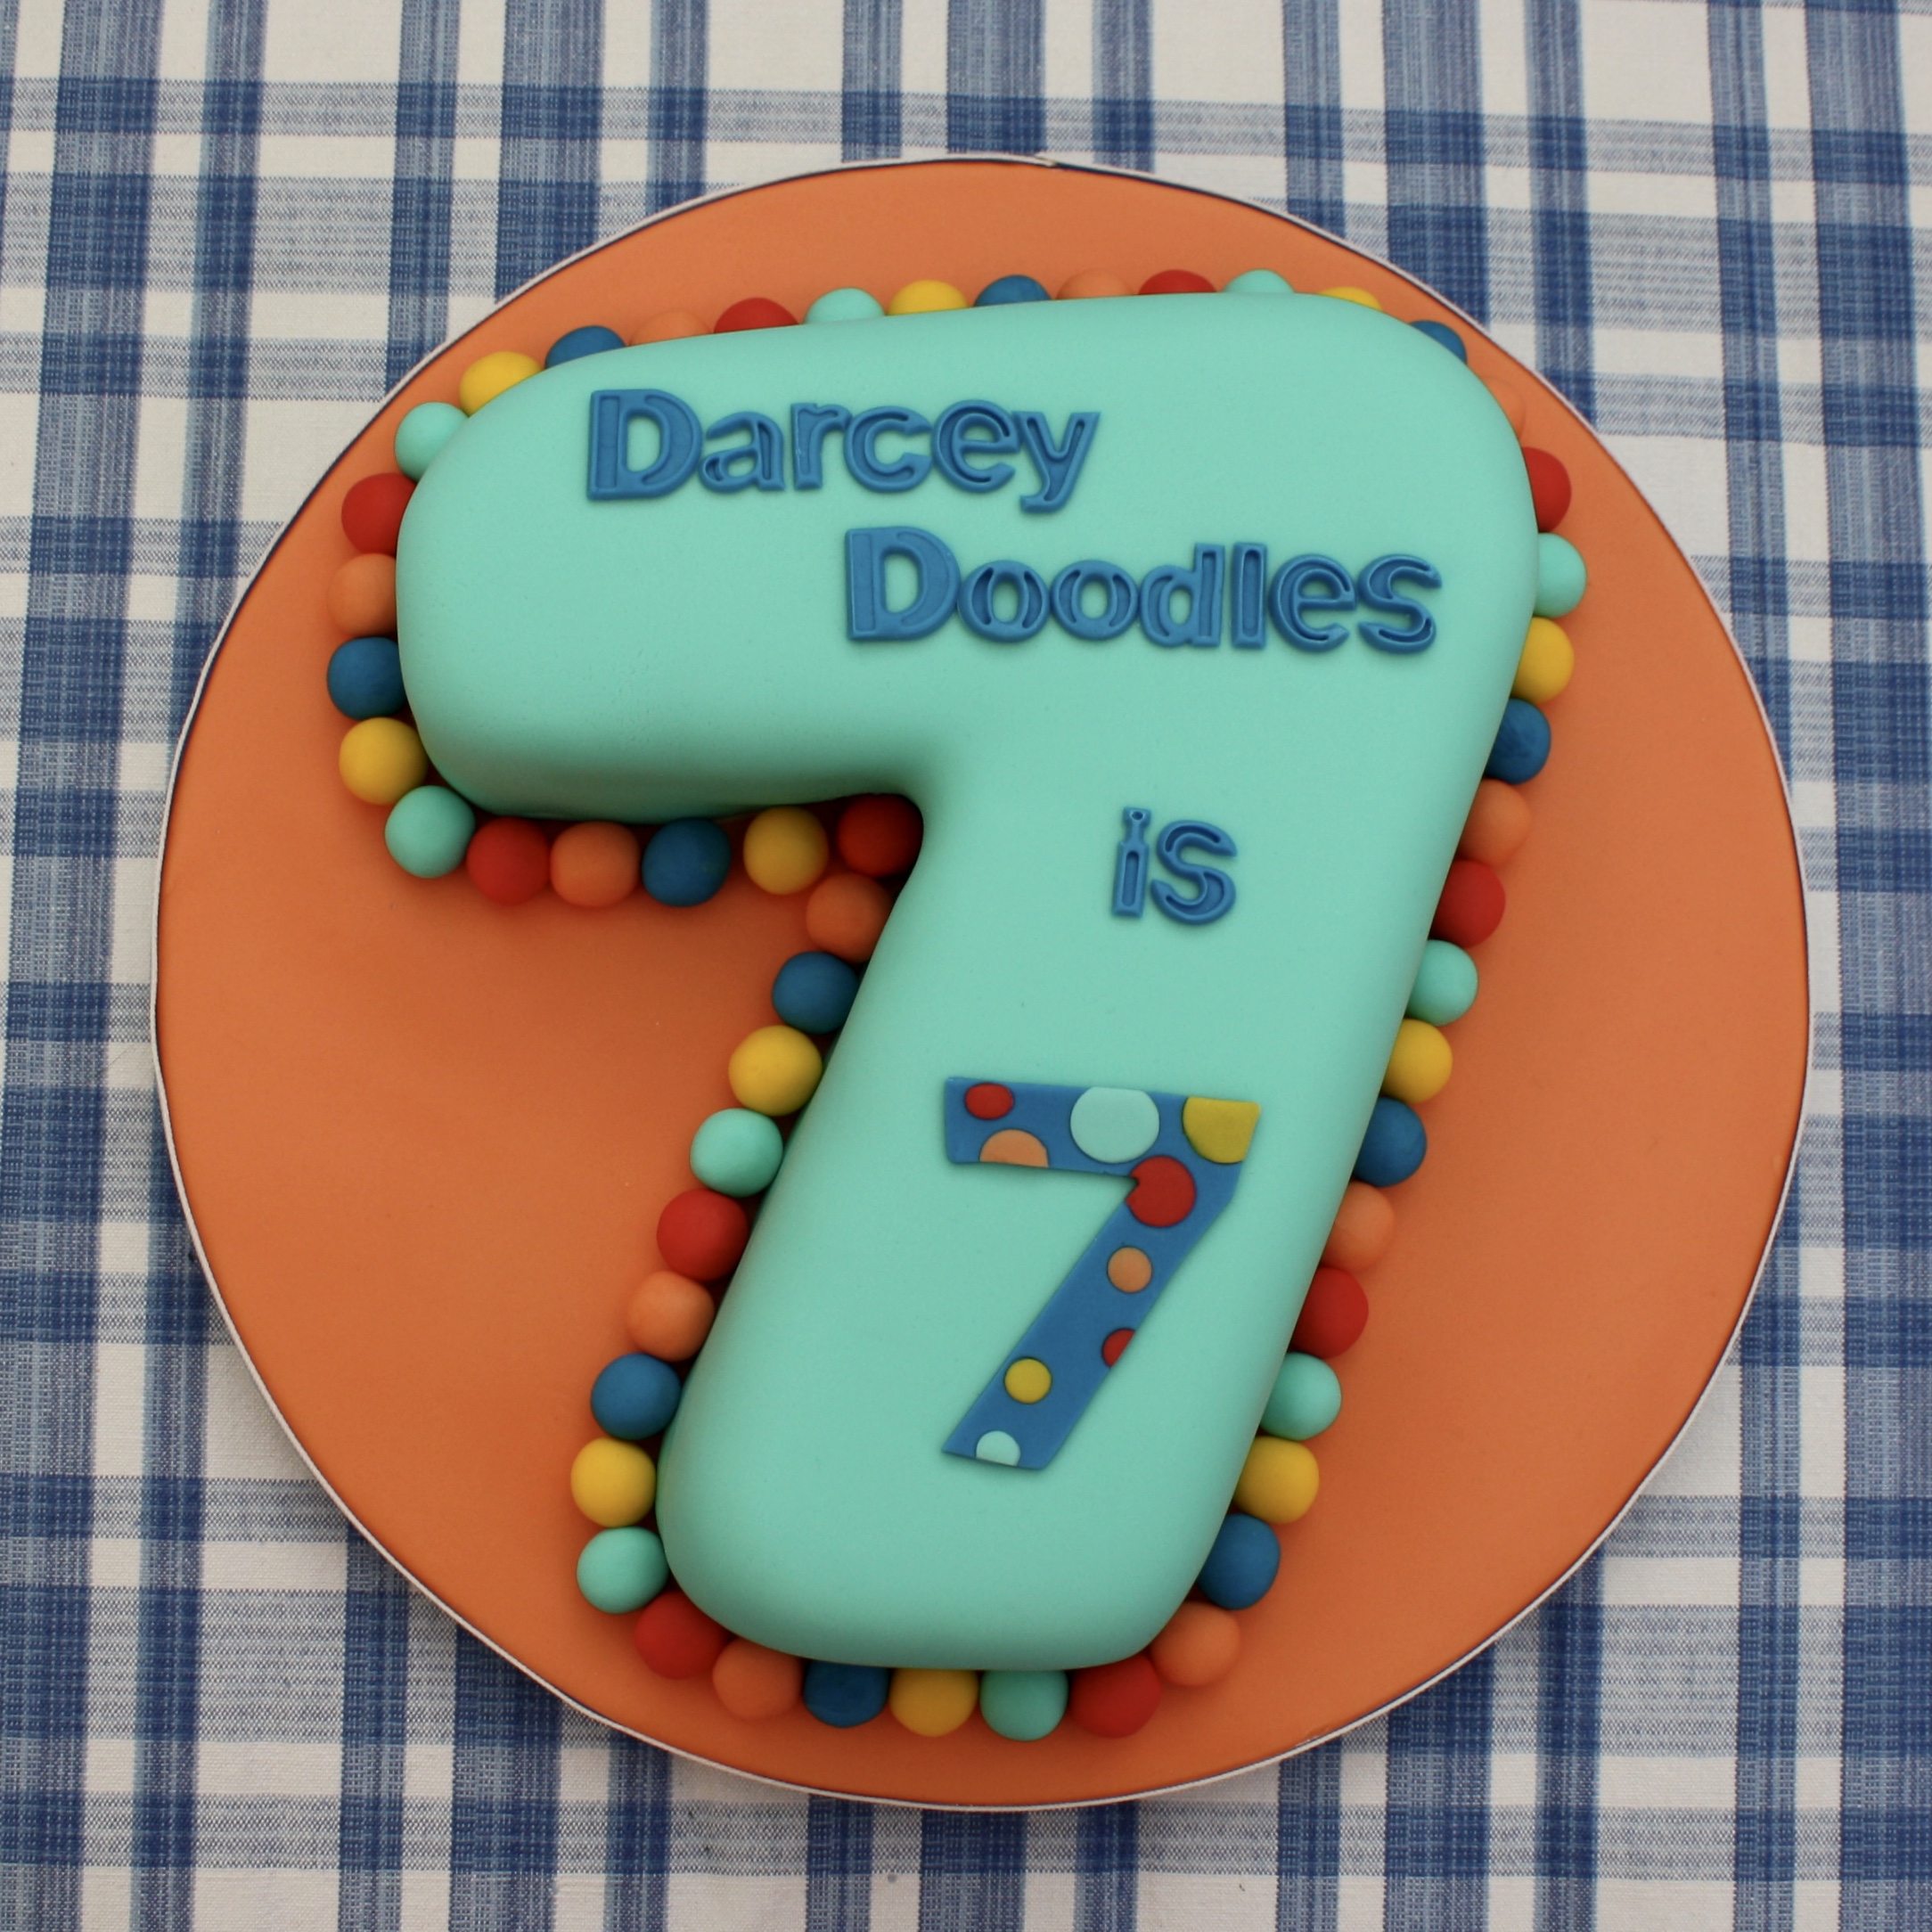
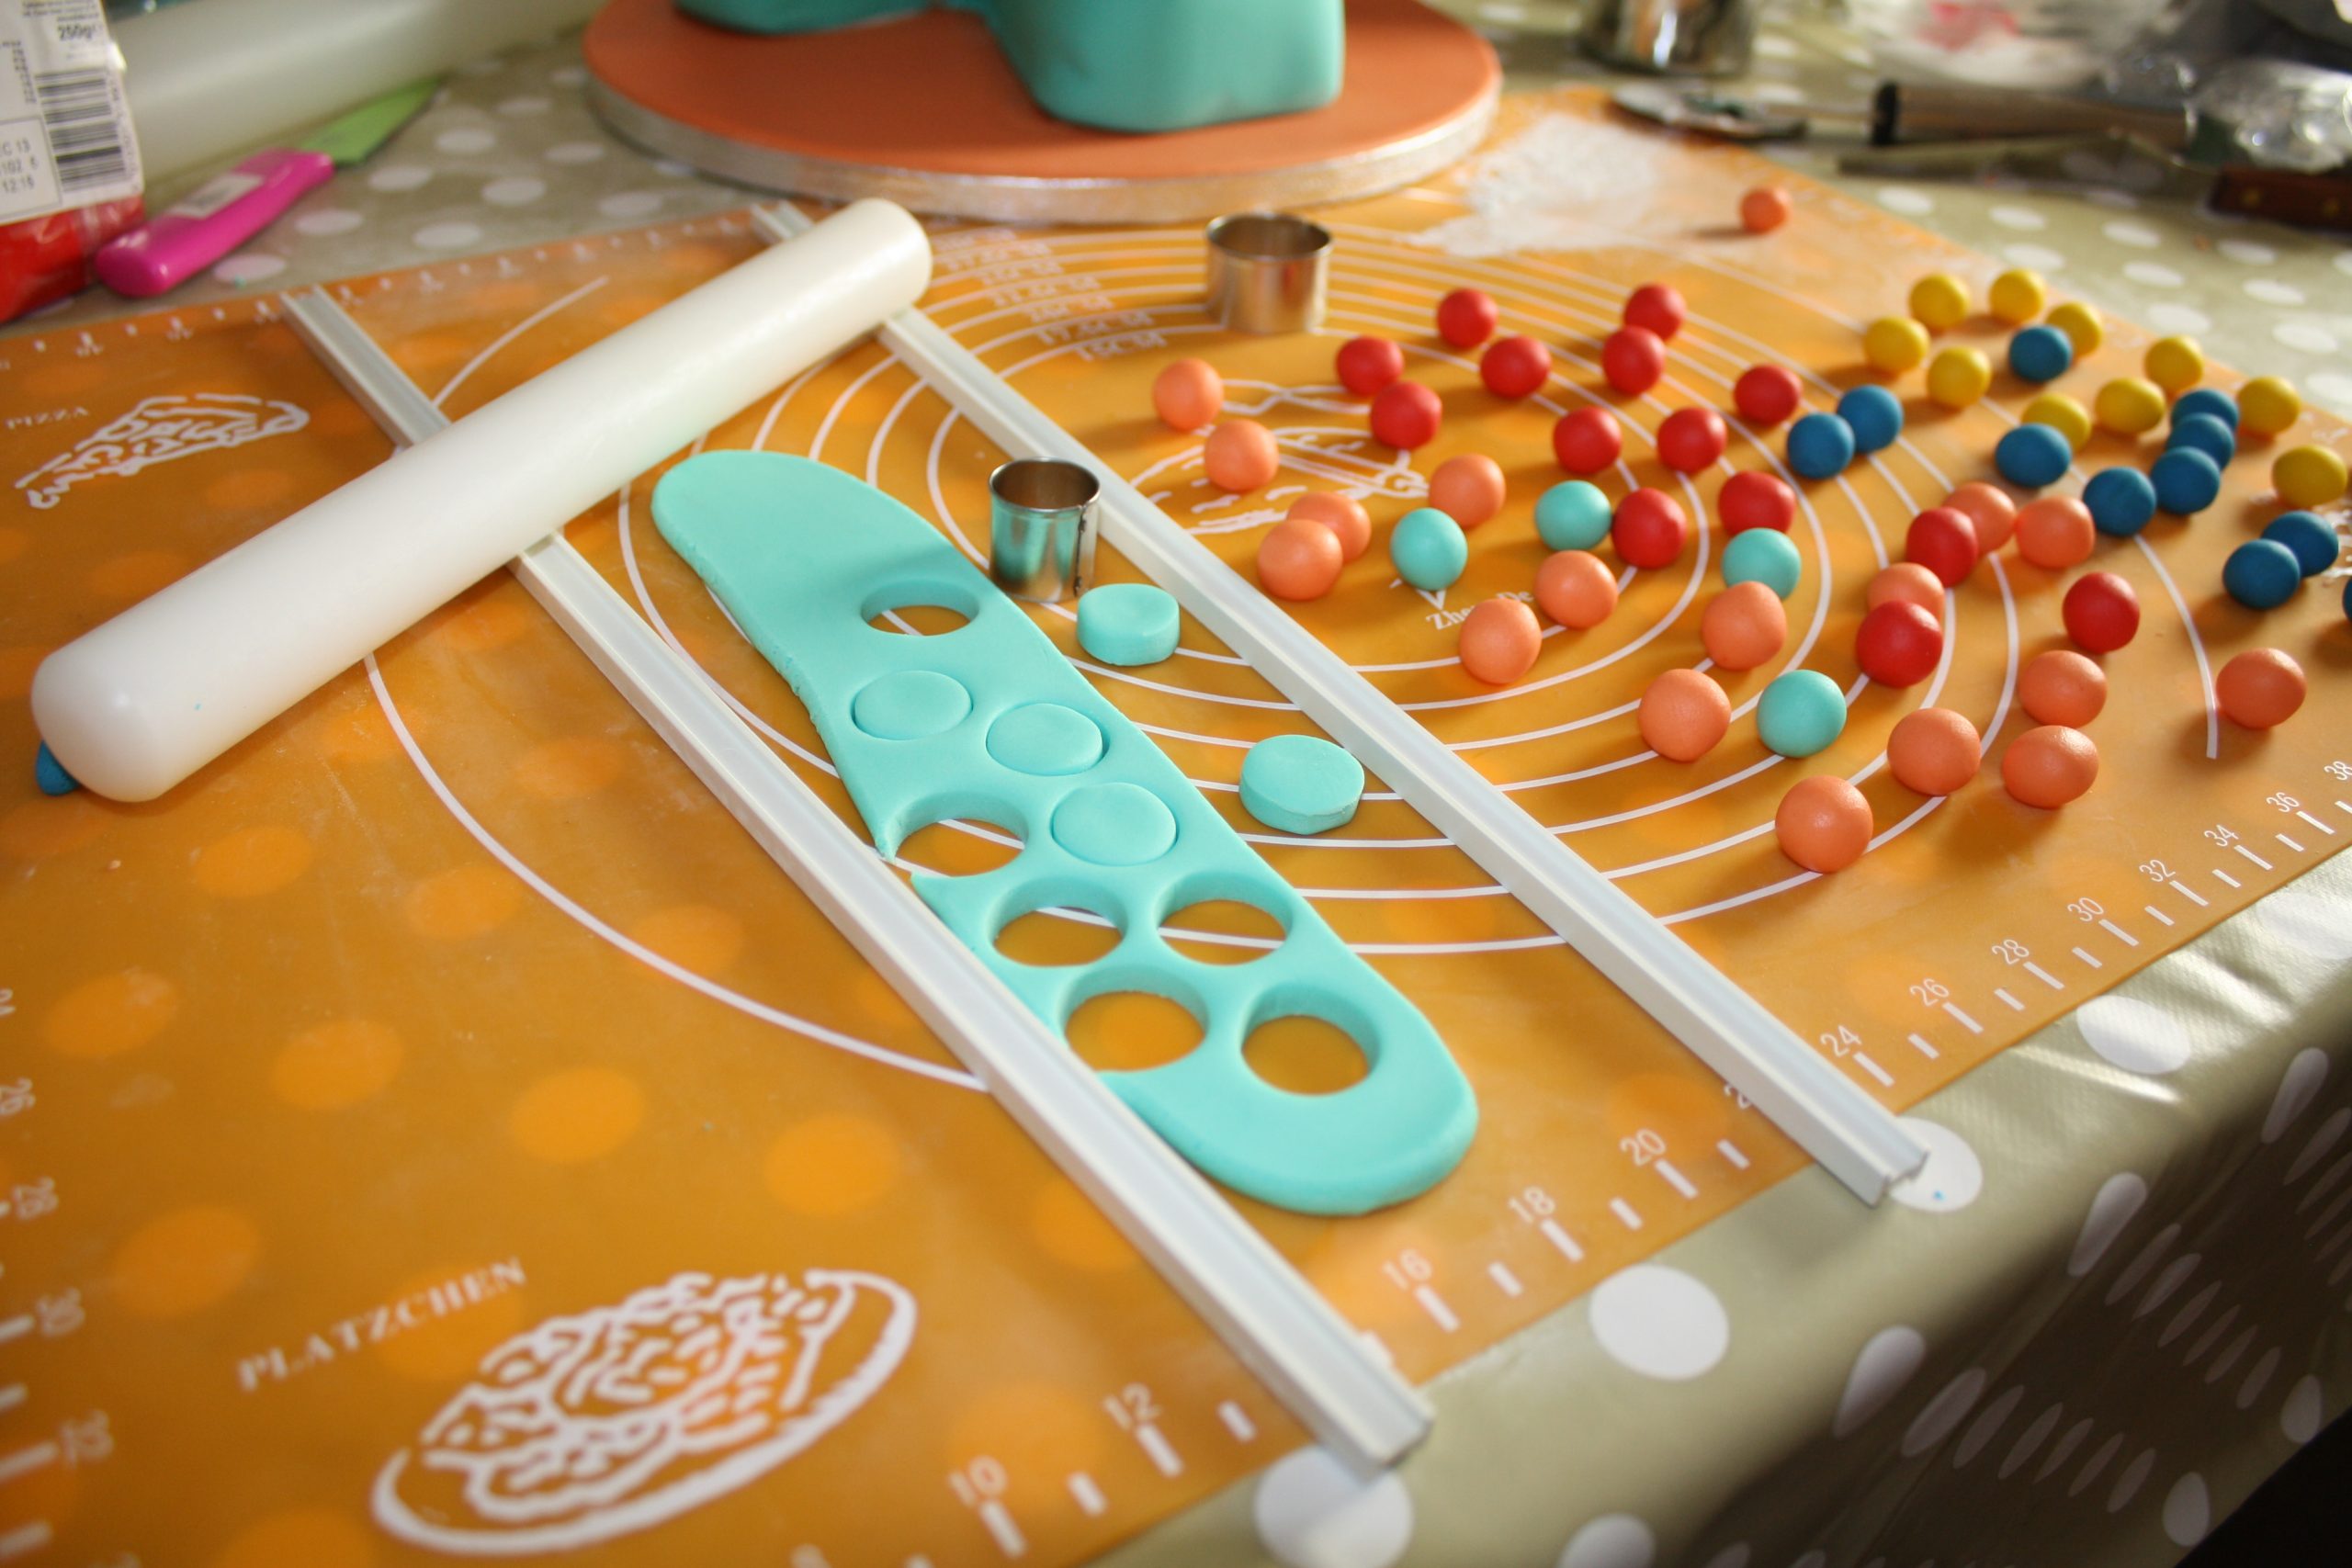
Rather than add ribbon to this cake I decided to make it really bright and colourful. I made balls from sugarpaste which I wanted to go all the way around the cake. To make sure that they were all the same size I rolled out the sugarpaste between two spacers and used a round cutter to create pieces that were exactly the same. I then rolled them into balls and left them to air dry for a bit.
The balls were secured onto the cake board with a little royal icing.
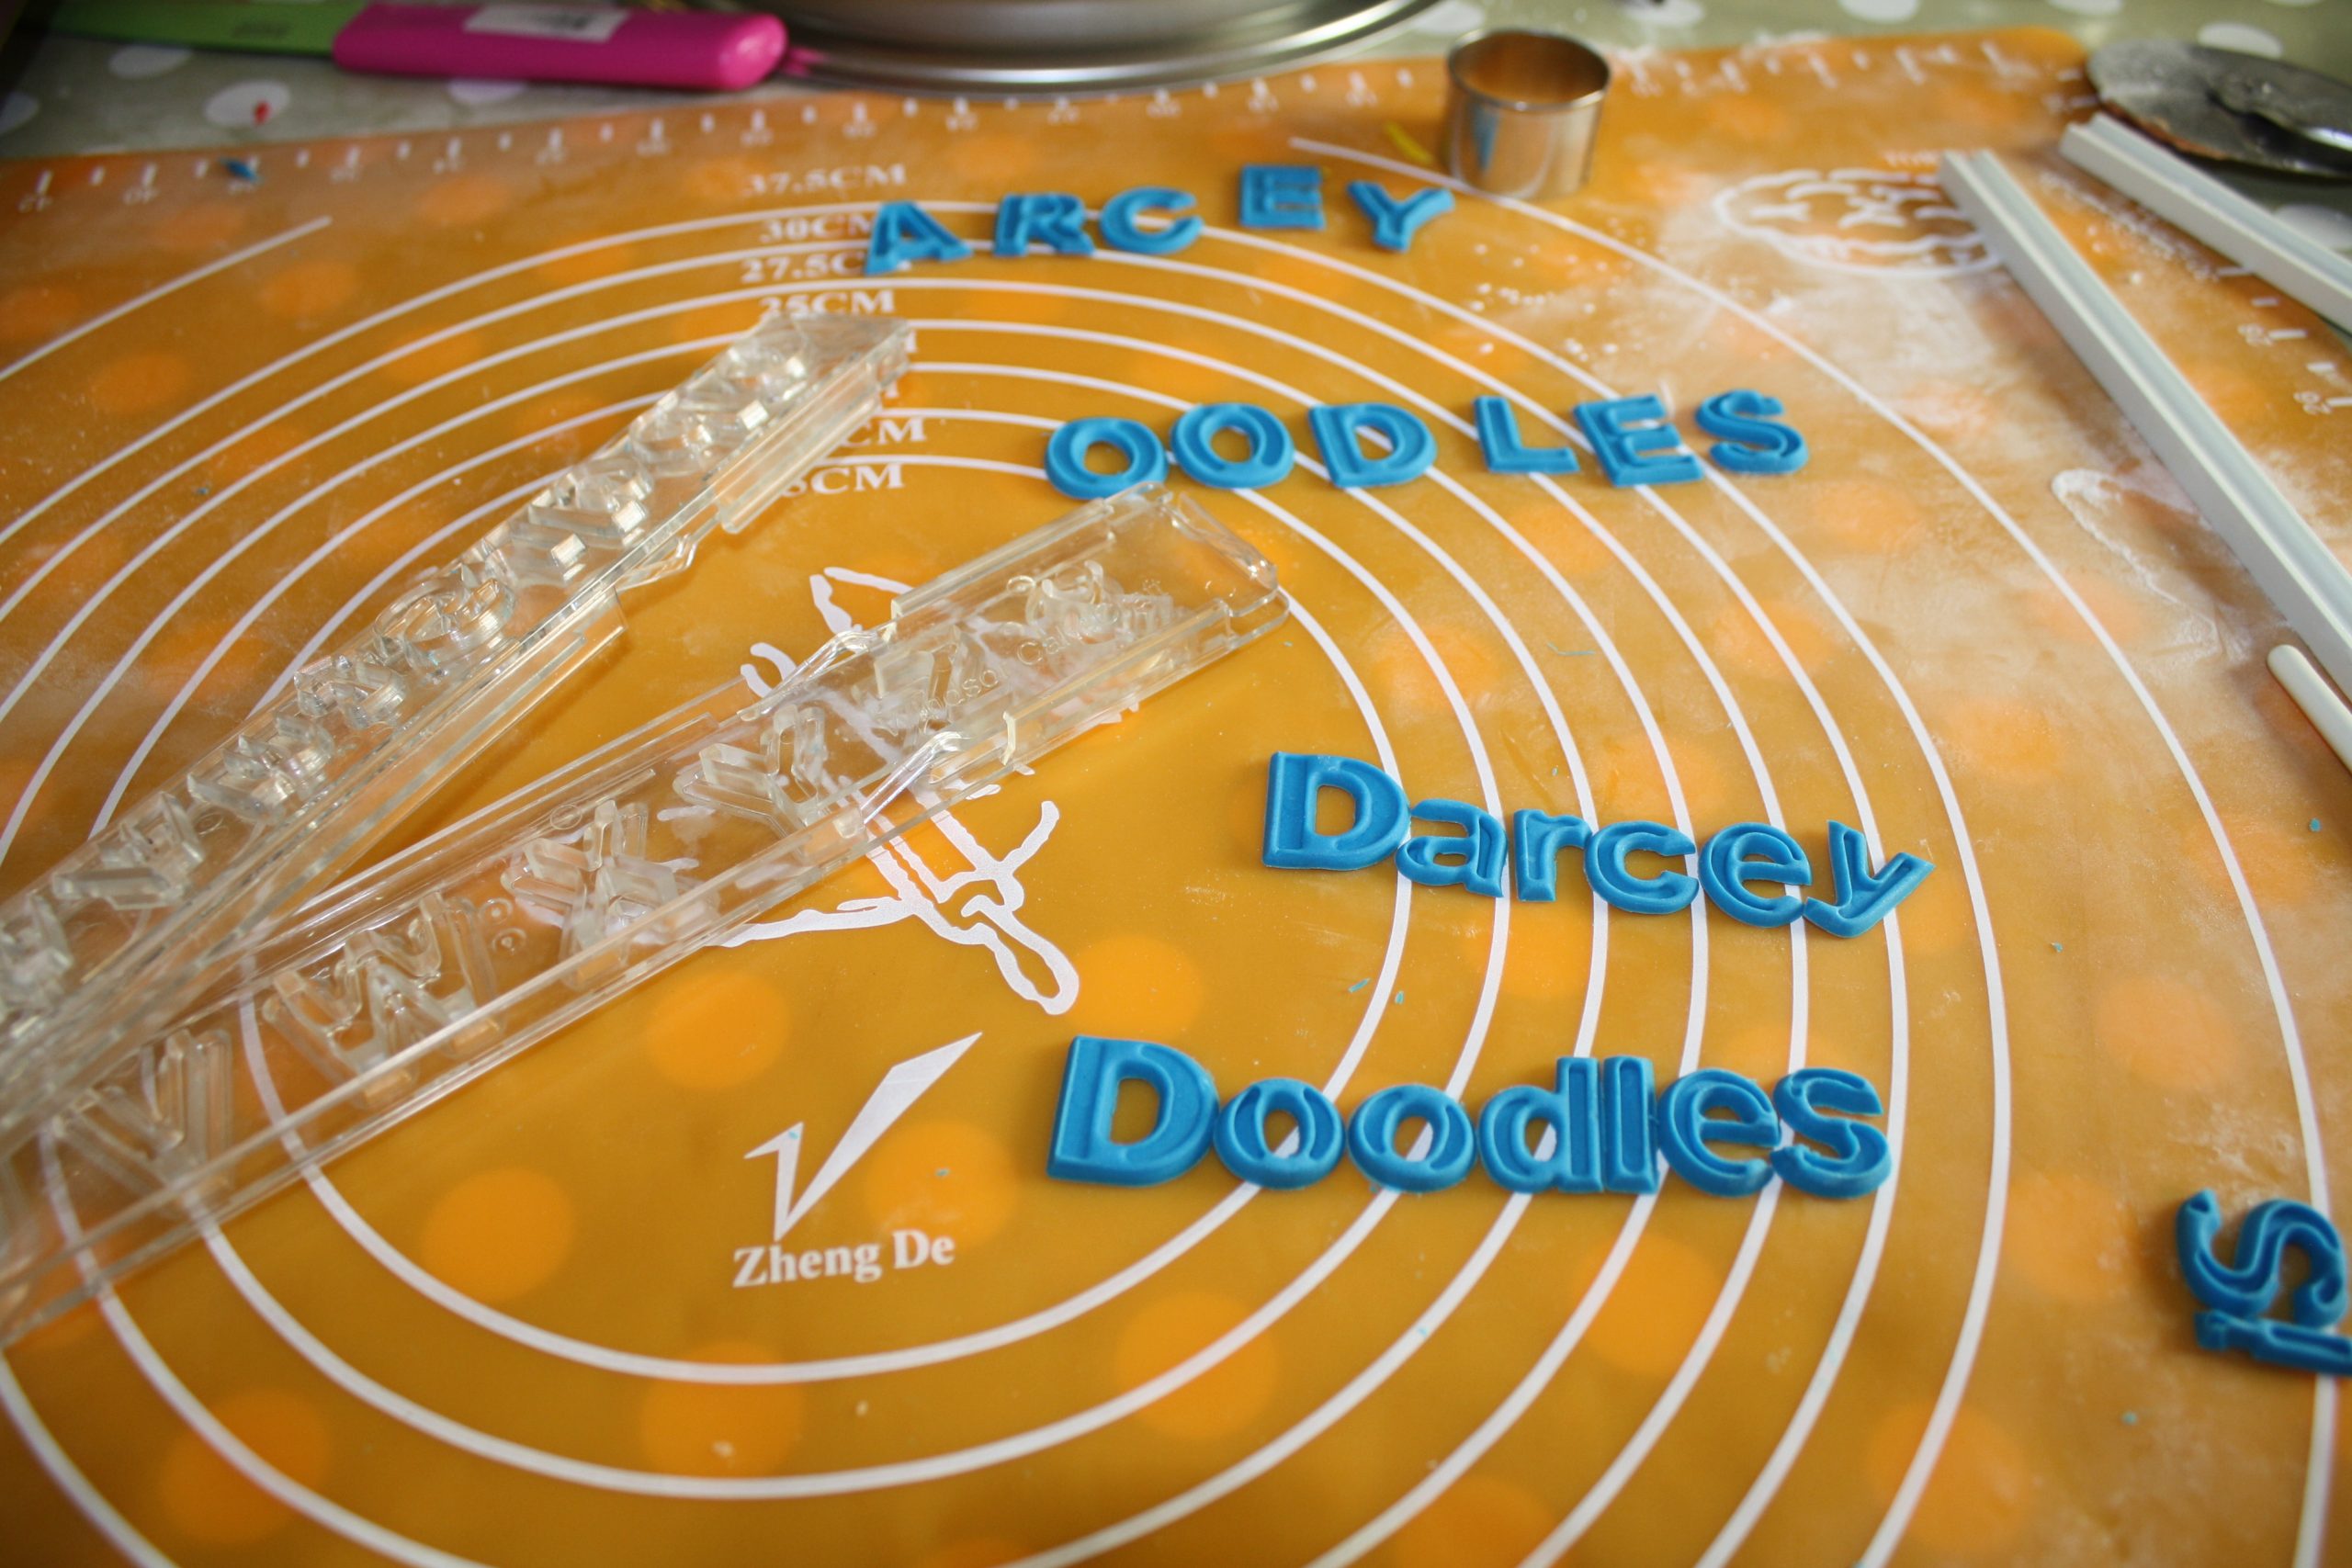
I used these plunger letter tappits to make the wording. I’ve never been very successful with them before so I was really pleased when I got them to work. I got the plungers tappits at the Cake and Bake show a few years ago and I can’t find them on line anywhere! I’ll keep looking though as they are a great tool and I’d love to share them with you guys.
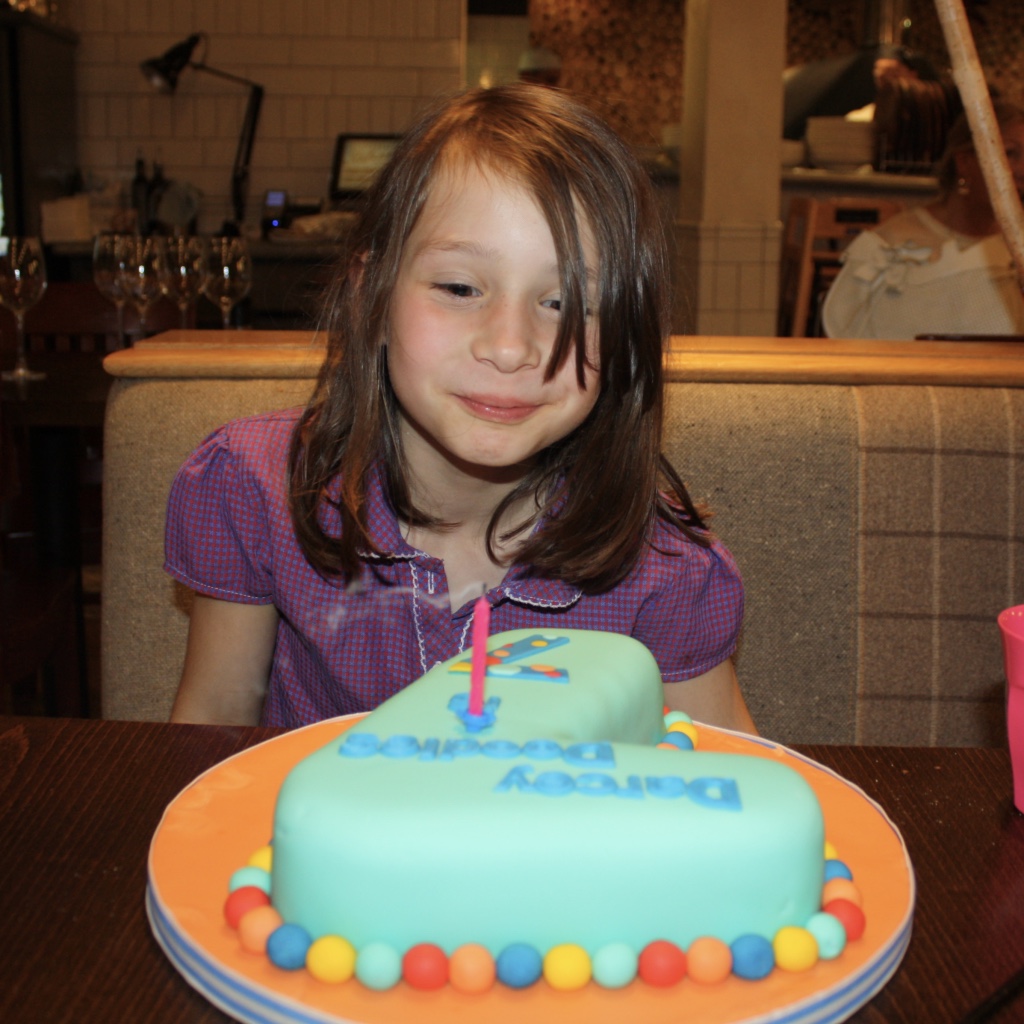
I positioned the wording with a little royal icing and then made the ‘7’ with some dots on to follow the theme.
So, there you have it. Darcey’s number 7 cake. We went to Zizzi’s pizza for dinner. It was her choice and it took her ages to decide. She made up this elaborate way to decide where we would go. We all had to write down four places we wanted to go and put a number 1-4 on each one depending on our first choice. She then got all the number ones together and it basically got very confusing! But what she wanted to do was choose somewhere that we all wanted to go, even though we had said as it’s her birthday it’s her choice. She’s a very caring little monkey.

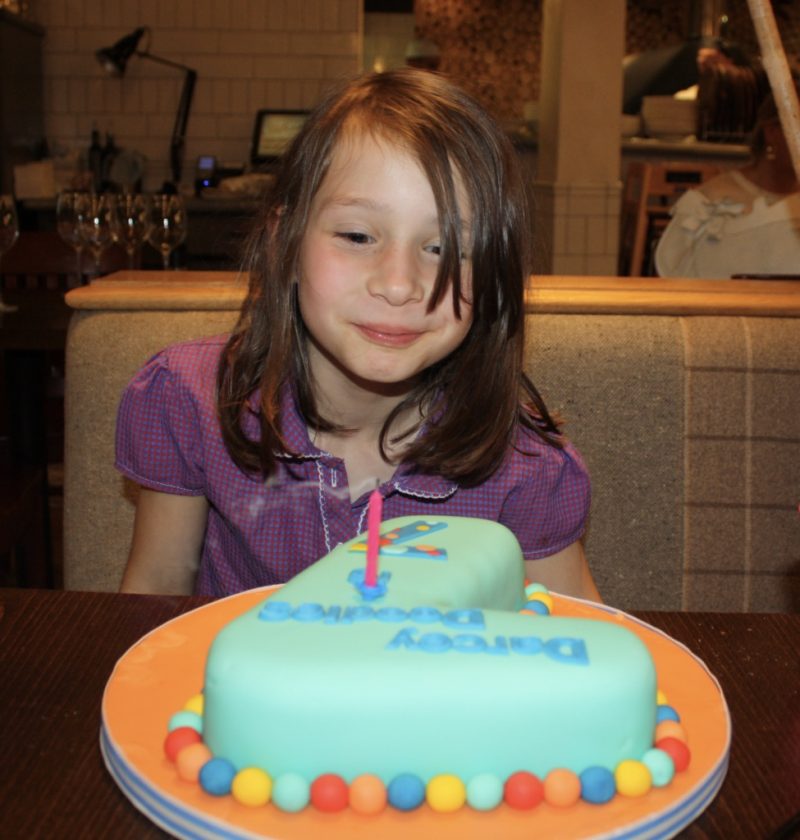
Jam and marzipan, that’s a new one to me but I like it! Do you think jam would work straight under icing? I know a lot of people aren’t that keen on it.
And those letters, LOVE them! I have about 3 sets of letter stamps and don’t get on well with any of them. If you do see them anywhere please do let me know! x
I reckon jam would taste fab with just sugarpaste but it would probably have to be rolled out quite thick to hide any lumps and bumps. I lOVE marzipan though so the more the merrier!
I’m trying to find another source for the letter presses. That’s the only problem with buying things at Fairs. You can’t get more!
This cake is fab! Can I just ask how you managed to get the letters to come out of the letter plunger so perfectly? I have the same ones and mine always get stuck and ruined. Any help would be amazing! Thank you 🙂 Becci
Hello,
I know what you mean. I have had loads of trouble with these in the past but on this cake it just seemed to work.
This is how to do it……
Roll out your sugarpaste or modeling paste really thin and cut it into strips that are just a little bit wider than the letters. I used a decorators paintbrush to apply a tiny amount of icing sugar to the inside of each letter mould I was using then I pressed the tappit onto the sugarpaste. I pushed the plunger down so that the imprint would show up on each letter then I just popped them out.
If any got a bit stuck I smeared a really thin amount of Trex onto my work surface so that the letter got ‘stuck’ on the work surface and not in the tappit. I then used a really thin pallette knife to put the letter to one side. Made sure that it was straight and then left it for 30 minutues to harden up a little before I handled it again to place it on the cake. It was trial and error to begin with. I should also mention that I made her name about 3 times so I could choose which letters looked best.
Good luck and let me know how you get on.
EmmaMT
Hi Emma, thank you for the reply! Never thought of trex on the work surface! Will be trying that one tomorrow!!
Am so loving this site. I want to go into baking, teaching myself and am finding this site so helpful. Am from nigeria and I want to be making amazing cakes and treats. Please I need the help of all you wonderful people to achieve this. Thank you
Hi Susan,
I’m self taught too! It’s about the practice. Well eating lots of cake and practice!
Thanks for your lovely words.
EmmaMT
Lol…that’s true emma but I will always ask for help from you all when I need it.
I`m making a “7” cake for my grandson and your tips have been taken on board and I`m hoping it will look as good as yours!!! It`s a go kart theme I`m needing, track etc and how to make sugarpaste go karts is my dilemma at the moment. Any help gratefully received … Maggie
Oh that sounds great fun. I would make a track that runs all over the ‘7’ then you can make little karts with heads sticking out of the top. I bet your grandson will love it!
Good luck
EmmaMT