
The only way to learn how to make sugar paste roses is at a Peggy Porschen vintage flower masterclass
As a keen baker and a passionate cake blogger I don’t think you would be surprised to hear that a call from The Peggy Porschen Academy was enough to make my day. But when that call is asking if I would like to take part in one of their Peggy Porwchen Vintage flower masterclasses you can imagine how big my grin was! Enormous!
At the time I was in the middle of trying to get an interview with Peggy for a feature I was writing for AchicaLiving, so I thought the call was about that. The lovely PR asked which course I might be interested in doing and as I was reviewing the new book Cakes in Bloom she suggested that I do a masterclass to create one of the arrangements from the book. Being cheeky I chose the two day Vintage Blooms class. It was a great choice!
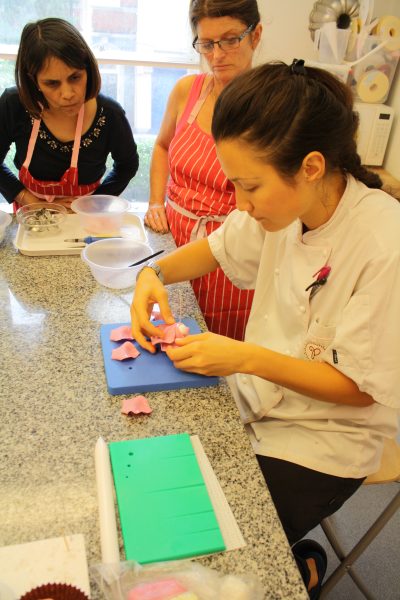
The two day course was small and friendly. Just five students, some of whom travelled from Germany and Switzerland to take part. The Vintage blooms we were learning to make included one rose bud, one medium rose and one big open rose complete with leaves and some hydrangea petals. It doesn’t sound a lot but trust me- these are very delicate and detailed blooms.
How to make roses
The tutor – Naomi took us through each step needed to make each petal and leaf from kneading and rolling out to veining and securing with wire.
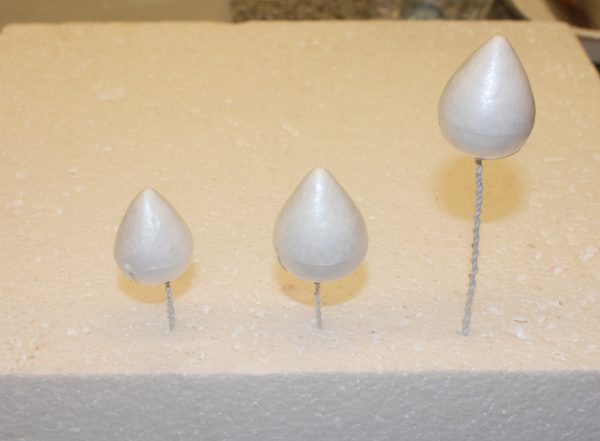
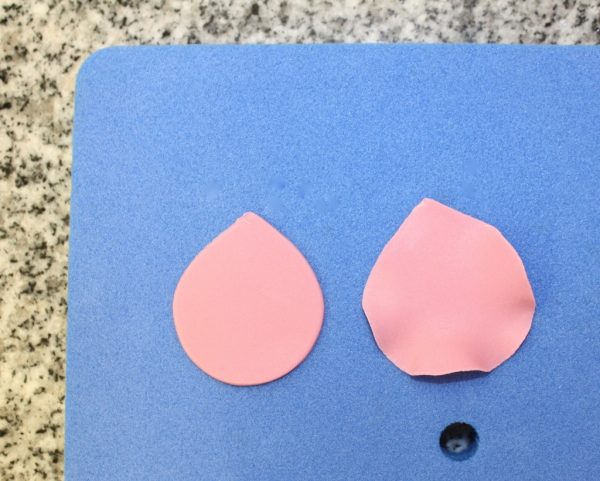
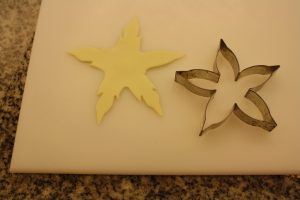
We started with a polystyrene bud which we covered with one petal. To make the petals for the rose we used two size cutters. Each petal was stretched and frilled with the end of a curved rolling pin. This makes it look realistic. We used edible glue to secure the petals onto the bud. I found this really difficult to begin with. I wasn’t used to working with flower paste and it kept cracking or I rolled it too thin.
Two petals. The one on the right has been frilled
Each rose starts in the same way. One petal to cover the polystyrene bud then three petals- with their edges curled over, wrapped around. If you stop there you have a rose bud.
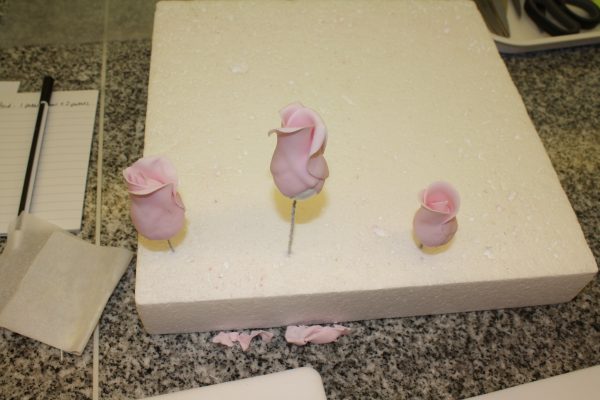
To continue making a medium rose you roll out and cut seven more petals. The flower paste dries really quickly so you only roll out what you need and keep the rest wrapped up in a zip lock bag. The petals are kept in a plastic sleeve (the kind used for paper documents) till they’re ready to be used. Each petal is thinned and frilled with the rolling pin and the edges are rolled over a cocktail stick then set in a palette to firm up a bit. 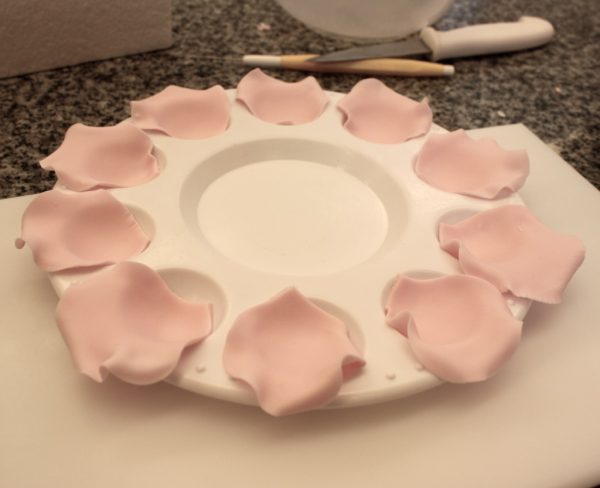 After half an hour you add edible glue to the base of the petals and then position them around the rose bud. This was tricky as most of the students had them going in different directions (an easy mistake to make!) The idea is to have the petals running in the same direction throughout. So left side under the previous petal and so on.
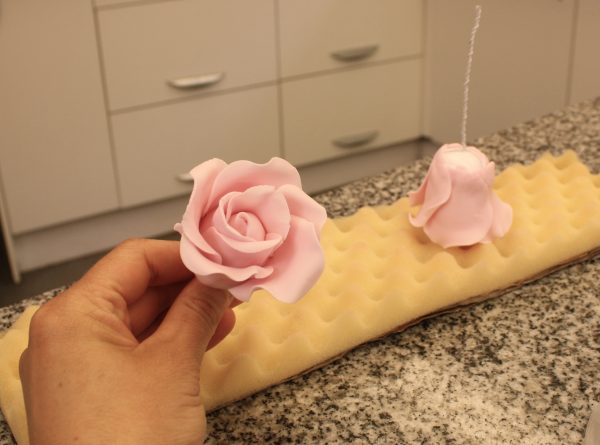 Naomi showed us how to assemble the petal and hold the rose up and look at it from underneath to check it looked right. Easier said than done! Once you’re happy the petals are pressed firmly into place and the rose is rested upside down on some foam to dry. At this stage you leave it overnight to harden so you can handle it the next day without pieces breaking off.
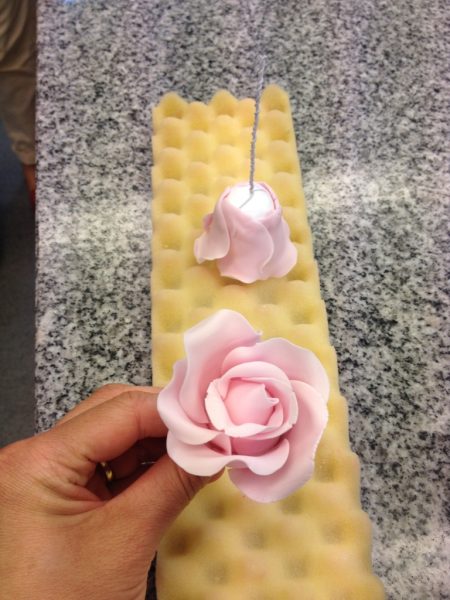
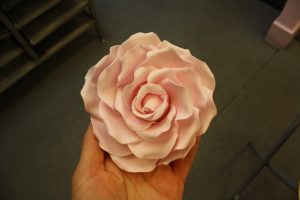
To make the large open rose you continue adding petals (nine for the last layer) if not you have the medium rose. Once the nine large petals are cut and frilled they are set in the palette again, this time they are only just in the palette so the bottom edge takes the curved shape of the wells – this is what gives the open petal shape on the rose. Leave for half an hour and secure onto the rose as for the middle layer. Leave to harden.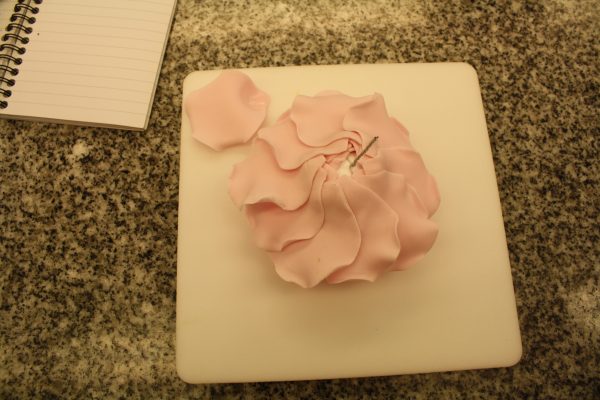
Once dry each rose is given a touch of pink coloured powder. We used more powder throughout the buds and inner petals than on the rest of the rose. This is what brings the rose to life making each one look different.
To complete the roses a calyx is cut out in pale green for each rose. It too is thinned and then little cuts are made in the sides to make it look realistic. These are added onto the bottom of each rose and secured neatly so no edges are sticking out. Green coloured powders are used to add definition to the calyx.
To make the leaves we cut out the shapes then pressed them between two veiners to give them definition. Wires were inserted into the spines and they were left to dry. Once dry coloured powders were applied with small paintbrushes. You only need the tiniest amount of powder and each leaf is brushed from the outside in with green and then pink powder. The pink is what gives that vintage tone.
The Hydrangeas
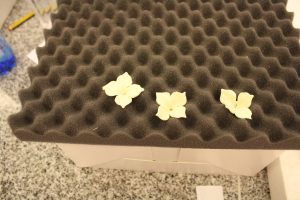 The hydrangeas were made in the same way as the leaves only the wires were threaded through the middle of each flower and were then set over some foam to dry.
 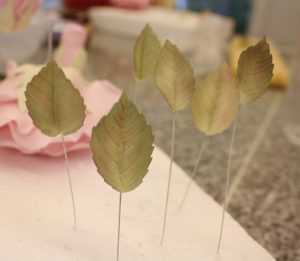 The flower paste was green and we dusted them with pink powders once dry. To hide the wire going through the centre of each flower a dot of royal icing was added.
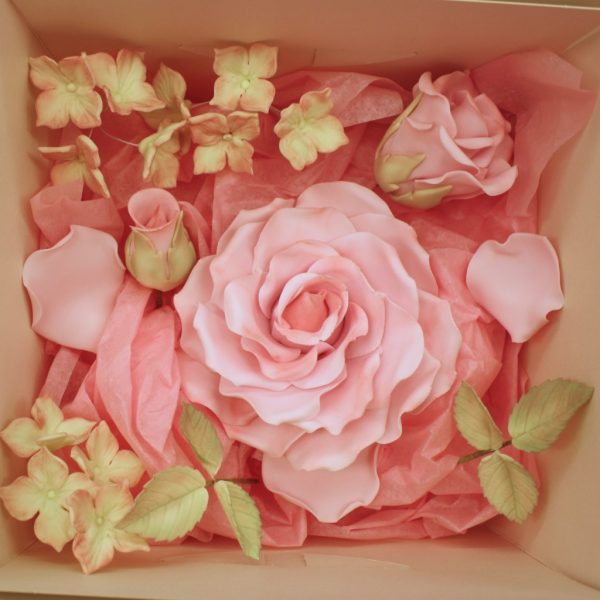
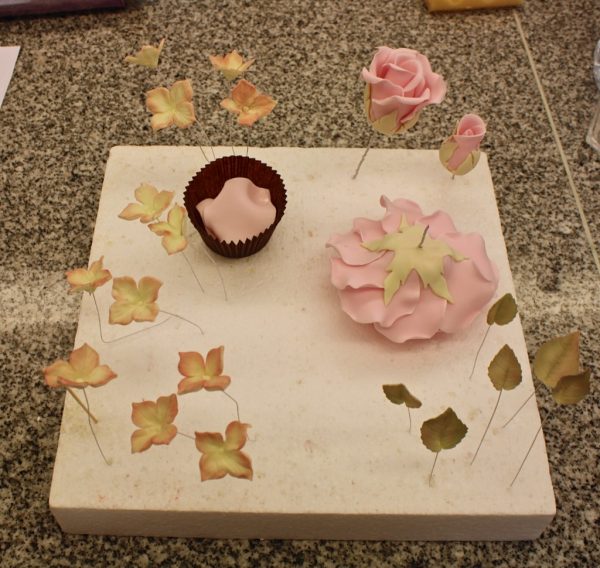
The end result: a box full of beautiful blooms.
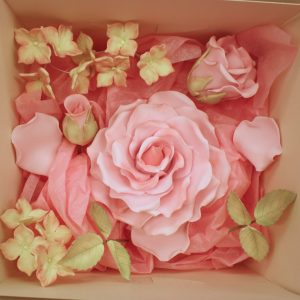
To say I was proud of my vintage blooms would be an understatement! I showed them to anyone who happened to come to my house. So that they were on show and not hidden away in a cupboard I placed them in a vintage tea cup and saucer and now display them in a (dust free) terrarium in my living room where they are on show to this day.
The course ran from 11.30am – 4pm on both days and it took that long to make all these flowers. If anyone asks why wedding cakes are so expensive this would be why. The amount of time, care, attention and detail taken over each and every flower, petal and leaf is amazing. The course was so much fun. Some of the students were on their second and third masterclass and you can see why. Peggy Porschen’s academy is just that little bid addictive!
Classes run throughout the year covering all aspects of baking, cake decorating, piping and sugar crafting. For more information and inspiration visit www.peggyporschenacademy.com
EmmaMT x
Disclaimer: Thanks to The Peggy Porschen Academy for inviting me to take part in their masterclass. I loved it. All opinions here are my own.
More Peggy Porschen posts you may enjoy
Peggy Porschen’s Lemon Limoncello Cake recipe
Peggy Porschen inspires us to make a Christmas cookie…or two!
Peggy Porschen Vintage Flower Masterclass
Cakes in Bloom: Peggy Porschen book review
Peggy Porschen’s New Wedding Cake collection
Peggy Porschen inspires us to make a Christmas cookie…or two!
Peggy Porschen’s New Wedding cake collection
https://cakesbakesandcookies.com/peggy-porschen-vintage-flower-masterclass/


Right that’s it . I want you to make my birthday cake since it’s not for a long time we might have to make birthday up. What a course . Your photos bring it to life. Brilliant
I have that book and I really love it. I love the illustrations in your post as it helps even more easily to see it, it makes me feel that I’m there with you!! Well done, you are rightly proud of your achievements here, I know from experience just how fiddly roses are to make. (I’m a keen amateur). Thanks for posting this.
Thanks Andrea. Good to know I’m not alone in my slow rose making quest!
EmmaMT
x
Oh wow, what an experience! You did a fantastic job and I love the display piece, what a great idea to keep the flowers safe and show them off 🙂 x
Oh Wow, wow, wow! I can’t believe the time and effort that goes into making one single flower, it’s incredible. Emma they look amassing, well done to you. xxx
Thanks Fou. x