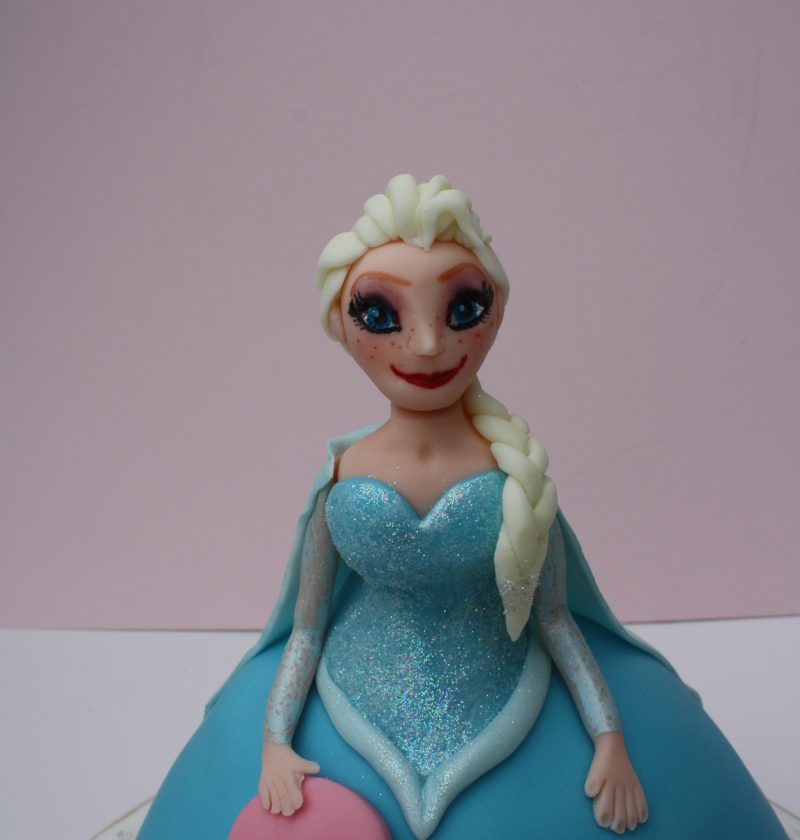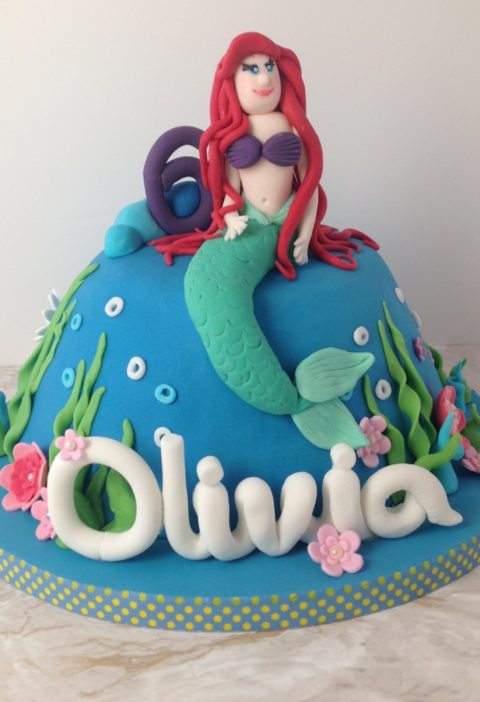
Last summer I was asked to make a cake for my friends little daughter Belle. I was sure she was going to be two but she was to be three! Where do the years go? It feels like only yesterday she was a tiny baby.
As I am sure you’re aware, if you are a little three year old girl your birthday/Christmas/life is going to be all about Frozen. Whether you’re in the Elsa camp or Anna that’s what all the little girls want. Did you see the program about Frozen that was on over Christmas? It’s the most successful cartoon of all time. The queue’s outside the Bromley Disney store with mum’s waiting to get their hands on the latest delivery of Elsa dresses went round the block and started from 8am and that was back in October! I can’t imagine what it was like in December.
My girls loved the film and I have to say that we have had a sing-along or two in the car (ahem- led by me and under protests of suffering daughters!) I’ve admitted to singing ‘Let it go’ on the way to shoots when the girls aren’t even in the car. I’m sure I’m not alone – am I?
So, I was pretty happy when I was finally asked to make an Elsa cake. I had been waiting !!!! The mum was happy to have a doll in the cake but I don’t really do that. It takes away the creativity and fun for me. So here’s how I did it.
How to make an Elsa Frozen cake
Start with the skirt

I started off with two Madeira cakes. One was baked in a Christmas pudding cake tin which gave the top the cake the skirt/waisted look. I matched the bottom of that tin to the closest size round tin – mine was a 7″.
I cut the half sphere cake in half then added butter cream and jam in between each layer then cut the outside of the cake into a more skirt shape. Next the cake was given two coats of butter cream – a crumb coat and a top coat.
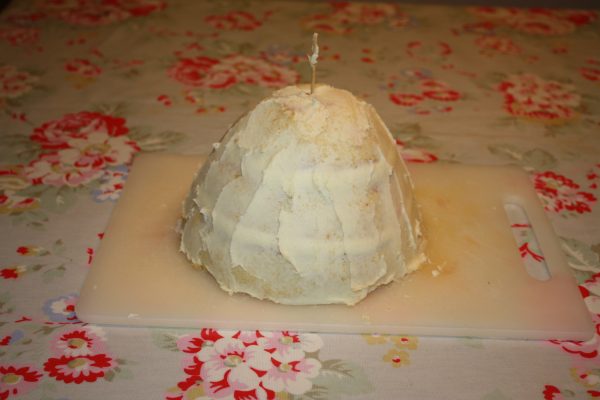
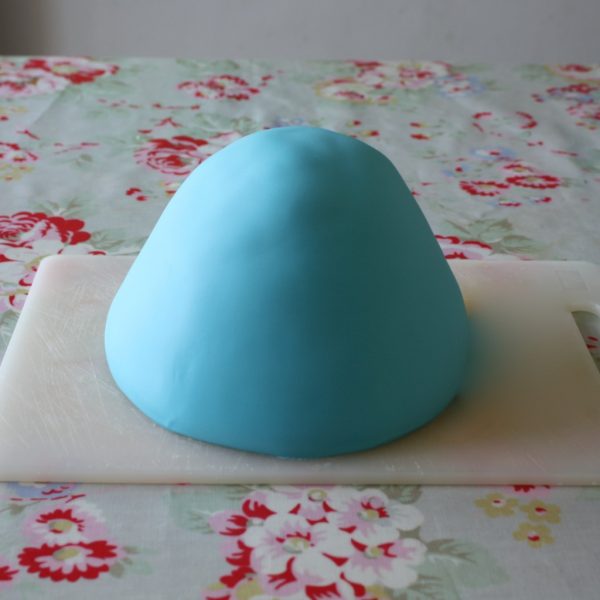
The skirt was covered in sugar paste, smoothed and neatened and placed on the cake board; which I had covered in white sugar paste a few days earlier. I set the cake to the back of the board so I had room for wording and a few snowflakes.
How to make Elsa’s face
It’s a good idea to make the head ahead of time. The more time it has to harden the easier it is to handle and position it when you need to add the hair later on.
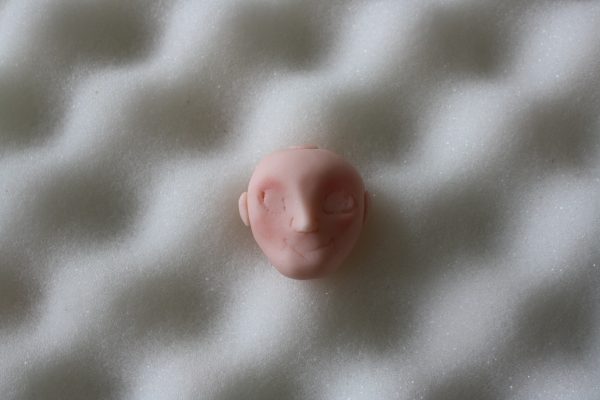
I coloured plenty of white sugar paste with Paprika coloured food gel (enough for the head, body and arms) so it was a really pale flesh colour then made the shape of the head. I used my fingers to make dents in the eye sockets and created a nose. I did make nostrils but they looked terrible so I rubbed them out.

I used a flower and Leaf Shaper Tool (the pointed one) to make a slight indent for the mouth and the outline of the eyes. I then filled in the eyes with white shimmer powder
. To make the shimmer into a paint I used a little vodka mixed with the powder. You only need a tiny amount of each. This white paint is really easy to apply if you go slow and don’t have too much on your brush. If you have lots of liquid on your brush it really runs into every crevice and beyond your outline. You’re better off doing two to three light layers rather than one thicker one.
To make the cheeks rosy I applied a small amount of pink powder. To do this sprinkle some powder onto a piece of kitchen paper then use a dry paint brush to apply it. Dab off as much colour as you can so it looks like there’s hardly any on it then brush it onto Elsa’s cheeks in a gentle round action. I also added a little bit to above her eyes to give her more of a glowy eye shadow.
Once the whites of her eyes are completely dry I painted on two circles in ‘baby blue’ food gel colour. The next step was to add the black eye liner. I used the ‘black’ food gel colour and a really tiny paint brush and went really, REALLY slowly. Paint on largish pupils in the centre of the blue of the eyes at the same time. Again leave it to dry completely between each layer. Paint on the bottom eye liner and add a white dot of shimmer on each pupil.


Use a small amount of the paprika gel colour – watered down to draw on the eye brows and the freckles.
For the ears add two tiny balls of the flesh colour, squished into ovals then pressed into place with a little bit of edible glue.
Finish off the face with a ruby-red colour for the lips.

I place the head on skewer to dry. The hole made by the skewer will make it easier to position later on.
How to make Elsa’s body
Take some of the flesh coloured sugar paste and mould it into the body shape. Position the body on the skirt, securing with some royal icing. Place a long skewer through both so that the body can set in place in a completely upright position.
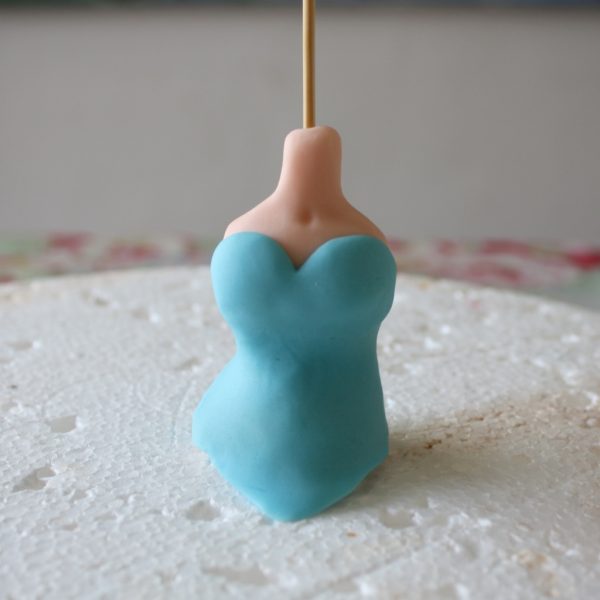
Roll out some of the blue dress coloured sugar paste and shape it so it has a dip at the neckline and a point at the bottom on the front. Wrap this piece around the body. Where the sugar paste overlaps at the back cut away the excess and smooth the join line.Roll out a long strip of pale blue icing and position it over the join line bringing it to a point at the front.
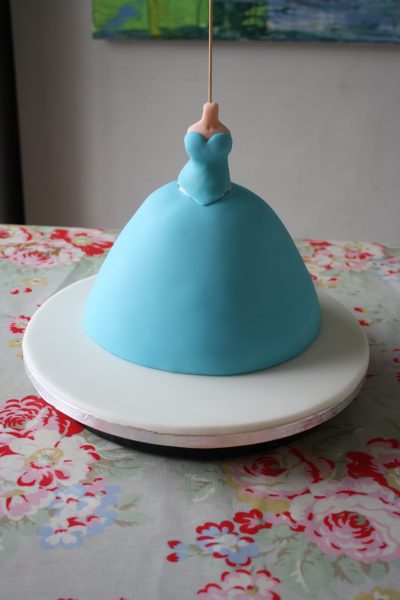
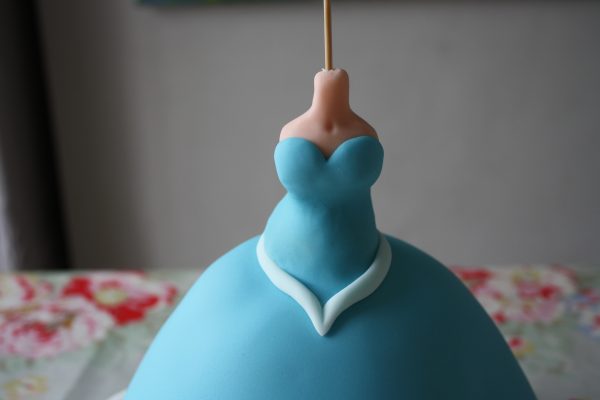
To make the arms: Roll out two pieces of flesh coloured sugar paste . Cut them to the desired length. At the elbow and wrists use your finger to roll the length and make it a tiny bit thinner. Flatten the ends so that the shoulder is more natural and the hand is the right size. Use a knife to cut the fingers and thumbs and a small ball tool to make indents where the nails are. Attach the arms with royal icing or food glue.
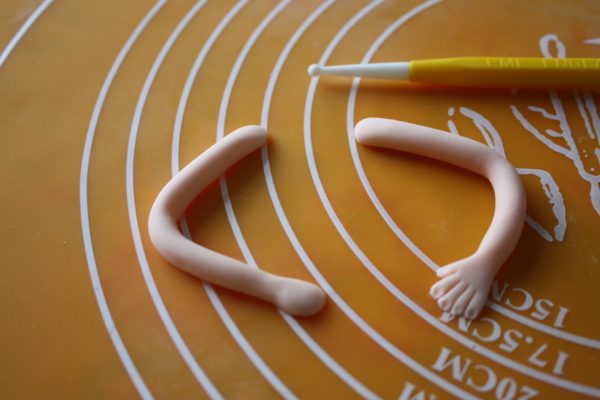
I cut out a large ‘3’ for Elsa to hold to personalise the cake a little more and glued this into place on the skirt before gluing the hand in place. This helps the arms to stay in place (glueing the hands) and lets you add a piece of rolled up kitchen paper under the elbow to keep the shape until it’s dry – which will take a good few hours.
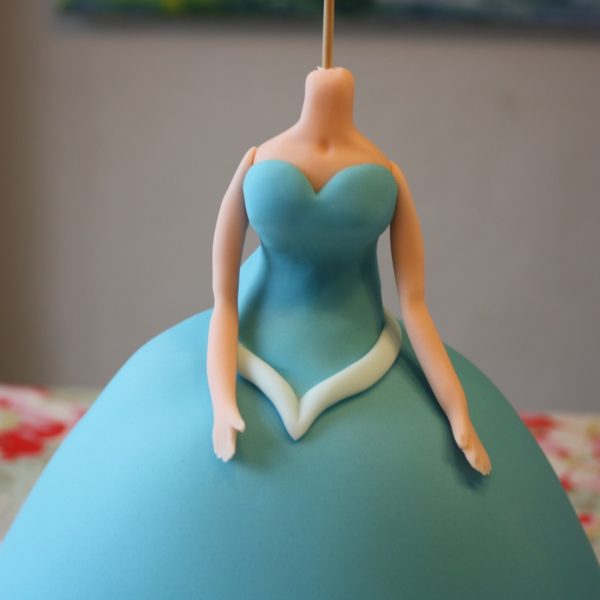
The final step is to paint the arms with a glittery blue paint – I mixed a little food colour with white shimmer powder and vodka and let it get quite runny. This gives the effect of a sheer sleeve. This took a few hours to dry.
How to make Elsa’s cape

The cape was made out of pale blue sugar paste rolled quite thin. I cut it to shape then held it up against the cake to make sure it was a good fit. Once I was happy that the top would sit nicely at the shoulders and the base would just sit on the cake board I gave the edges a frill by rolling it with a Bulbulous Cone Modelling Tool. The cape was stuck onto the cake with royal icing. A piece of kitchen paper was positioned under the base of the cape and a layer of shimmer food colour – the same as used for the sleeves, was used to coat the whole cape to make it shimmer and shine.

How to finish Elsa’s body

The last step for the body was to add a layer of glitter. I used a paint brush to coat the bodice with edible glue then used the tiniest amount of glitter on a dry brush. Too much glitter on your brush and it will go everywhere! Very slowly dab the glitter over the bodice then leave to dry before you touch it again.

How to make Elsa’s hair
Now it’s time to position the head. Cut the skewer down so the skewer won’t stick out the top of Elsa’s head and place the head in place. Use a little royal icing to secure her.
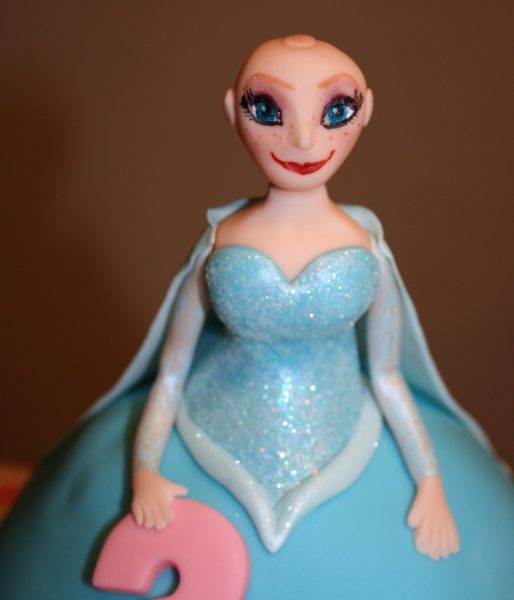
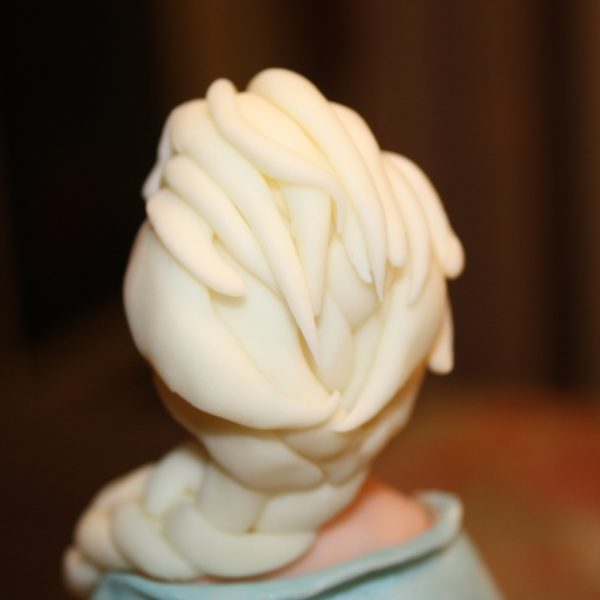
For the hair; roll out strands of pale yellow sugar paste and use three thicker ones to make a long plait. Secure the plait to the back of the head so it comes down over her shoulder. Add more strands from the top of her head so that they cover up the top for the plait. Use smaller strands to create Elsa’s fringe. Add a little glitter to the ends.


As Belle is a short name I was able to add it to the ‘3’. I thought a touch of glitter was needed here. All three year old girls love a touch of glitter!
Adding snowflakes
To decorate the cake board I cut out some snowflakes with snowflake plunger cutters and added yet more glitter to them using edible glue. I cut some in half so they could be placed right up against the skirt so it looked like Elsa was walking on snow.

Before glueing the snowflakes in place I piped the birthday message then used royal icing to position the snowflakes.
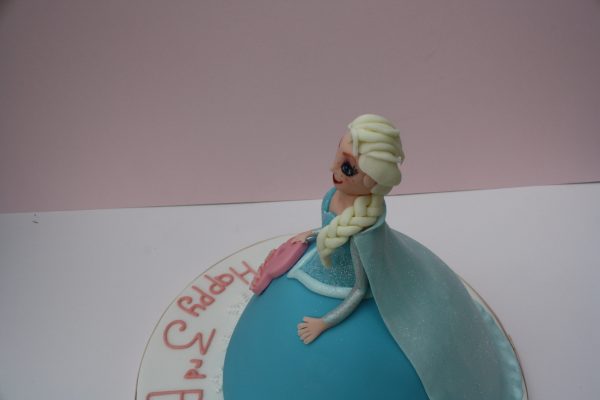
This cake although looks quite complicated and time-consuming, actually didn’t take that long to make. The longest part is having to wait for the head and arms to harden- and the eyes to dry between each layer.
I was pretty happy with the end result but if I do it again I would make her neck a bit longer. Also as I was typing this up Darcey peered over my shoulder and said she looks a bit fat! I didn’t see that till she mentioned it so next time I’ll make her slimmer.
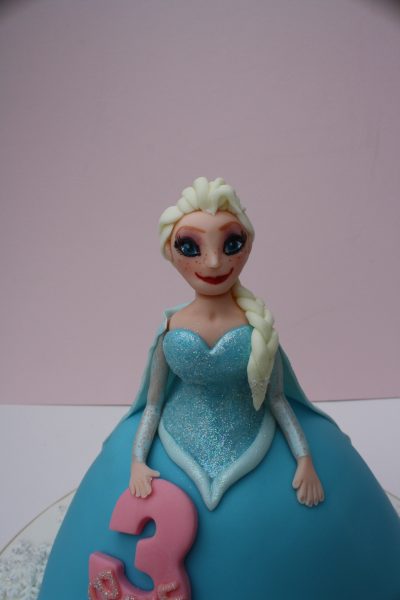
I really enjoyed making it though. Anyone need an Anna cake? She’s next on my want list!
EmmaMT
x
More Kids Birthday Cakes you may enjoy
5 things I learnt making a Lego man birthday cake
Sleeping Beauty Birthday cake for FCFK
How to make a merry go rounds birthday cake
How to make a simple Ballerina birthday cake
How to make a Minecraft birthday cake
How to make Beau’s sleepover cake
How To Make A Swimming Pool Cake
How to make a Mario and Yoshie Birthday Cake
