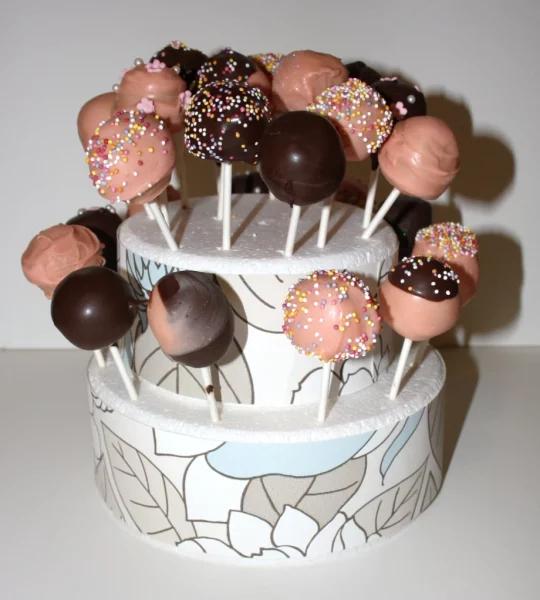
I mentioned yesterday that I had never tried to make cake pops before. I think it’s because I read a hysterically funny blog post somewhere (years ago) where the person trying to make them made a complete mess of it! They weren’t round, the candy melts wouldn’t stick, the sticks wouldn’t stick and her disaster stuck in my mind. So I really read the book Pop Party and all the instructions on how to make pops and off I went…….
What you’ll need
- 8″ cake. (I used Madeira but anything goes!)
- Buttercream (Mix 150g butter at room temperature with 250g icing sugar and 1 tsp vanilla essence)
- lollipop sticks
- Candy melts (available from Sainsburys,Hobbycraft & Amazon)
- Decorations ( I used sprinkles, pearls and mini flowers)
How to make the cake pops
I used an 8 inch Madeira cake . I removed all the dark outer edges of the cake to leave a nice clean, fluffy surface. Then I whacked it piece by piece into the food processor to turn it into crumbs.
I wasn’t sure how much I was going to need so I turned the whole 8 inch cake into crumbs!
Ideally you should use a cream cheese frosting to mix in with the cake crumbs, but I had completed a cake during the week and had some buttercream left over, so added that instead to the food processor bowl and blended again.
Beat it again till it forms a clump.
In her book, Pop Party, Clare O’Connell says to weigh each ball so that they will all be about the same size. She suggests 30g each which I agree is spot on! Then roll them in to balls and place them on a tray and pop them in the freezer for about 20 minutes to harden them a little. They do tend to get a bit squishy if left out or handled for too long.
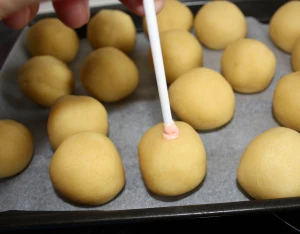
Heat up a few candy melts (which are basically a type of chocolate icing) so that you can place a little at the end of each lollipop stick.

Then push the stick into the cake pop and leave to dry.
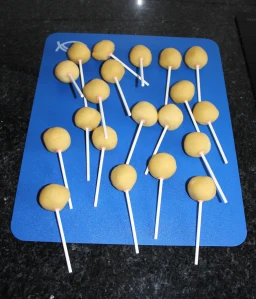
We made half the cake mix into round pops and the rest as little cylinder shapes. It would seem that my hands are not the right shape to create really round balls. Bumpy ones are not a problem at all!
It was at this point where I got a little helper (and my kitchen became instantly covered in chocolate and sprinkles!)
To heat the candy melts you can place them in a microwave friendly bowl on half power and stir every 30 seconds until they are all completely melted. When they are ready they look like a thicker lumpier version of melted chocolate. To make it possible and much, much easier to coat the pops Clare says to add a little vegetable oil to the melts, one teaspoon at a time. I did this and couldn’t believe how much it needed! I kept adding it a spoon at a time until I could dip each pop and coat it easily without it being thick and lumpy. Don’t worry, they still dry smooth and hardish.
I had to improvise when it came to where to put them to let them firm up.
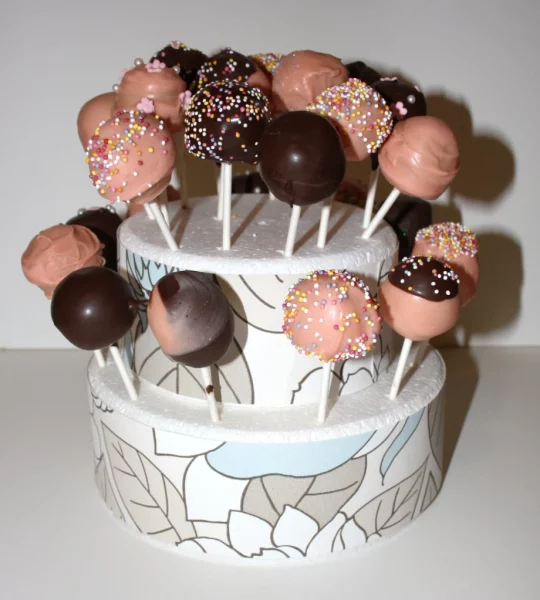
We decided to make pink and chocolate pops with sprinkles, pearls and mini flower decs. Some we double dipped in both colours. In the end it was just as I had expected, but with more mess, but they tasted great and looked pretty cute all together.
As you can see, I made a cake pop stand from two polystyrene forms which I glued together and placed strips of wallpaper around the out side edges. (How I love my hot glue gun!) I then used a spare lollipop stick to create the holes in the polystyrene for the pops to stand in. Remember to leave enough space in between the pops so that they don’t knock into each other.
Once assembled, I wrapped the whole thing in cling film and tied a ribbon and bow around it so I could hold onto them in the car and then present them to my friend at her party.
They seemed to go down well. Well there weren’t any left in any case!
So with my first cake pops under my belt I want to make them all the time now! I’m making my cousin a cake for her baby shower party in a few weeks. I think there may be a cake pop or two on that cake now! Watch this space!


Wow! You make
Wow! You make it look so easy and like l
No, not easy, especially with my little helper!!!
Thanks for sharing this. My baking skills are not as great as yours, but pop cakes seem like a good indoor project to keep my two little cooks busy one afternoon during the Easter break…..
From the two books you recommended: Which one should I buy to support this initiative at my kitchen?
Thanks for your comment.
I adore both books but I think once you know how to make cake pops you want to be inspired so I would say if you are buying just one go for the newer one ‘Pop Party’
Good luck and have fun
EmmaMT
My cake pops turned out to be a disaster! I mixed vegi oil in like you said as the candy melts were really thick and hard to work with however once they dried oil started seeping from the hardening candy melt.. Where dis I go wrong?? They looked awful! They still tasted good though, in my opinion anyway because I had to eat them all since they looked so bad!
Rachel xxx
Oh nooooo! What a nightmare!
I’m sorry your cake pops didn’t work out. I have to admit that when I made them the fist time I made such a mess in my kitchen. I almost couldn’t take the photos for the blog!
I’ve now made cake pops twice. The fist time was from the post you read and I made them again last week. I used the Wilton candy melts which I put in the microwave for 30 seconds at a time, stirring between each zap to make sure that they didn’t over cook and melted evenly. The first time I used vegetable oil and the second time I had run out of the veg oil so I used olive oil (which I was sure wouldn’t work, but it did). I don’t think it made any difference.
When adding the oil you need to add a table spoon of it at a time, so that you don’t add too much. I added until I could dip a cake pop in, swirl it around in the melts and it would coat the whole thing without looking lumpy. I found that they hardened to a smooth finish even if they didn’t look like they would.
I hope this helps and doesn’t put you off trying again. They really do taste fantastic, but I think you know that. It sounds like you’re a girl after my own heart ‘having’ to eat the ones that don’t go as planned.
Good luck and let me know how you get on next time.
EmmaMT