
 Is it me or did Christmas get here quicker this year? I seem to have been even busier than usual and I had planned to be so organised!
In an effort to give more personalised gifts (and cut back on the pennies) I decided that we would give cookies to lots of people this year. As usual these things – like a DIY project – always take longer than you plan for. I wanted to make some for our extended family and friends as well as teachers, (of which Beau is insisting we give to the four she has in any given week! Where did four come from?) There is also the matter of the class Christmas parties which seem to have me making nearly 100 double chocolate star cookies (for some strange reason there were 100 when I coated them and there aren’t that many now, she says wiping the melted chocolate from her mouth!)
When it came to Tim’s family I knew I wanted to make an extra special effort. It was time to make the bauble shaped cookies I have been thinking about for weeks. Thinking about – but not actually finding the time to get on with! Today I finally got them finished and in the post. There’s a blog post on them coming right up.
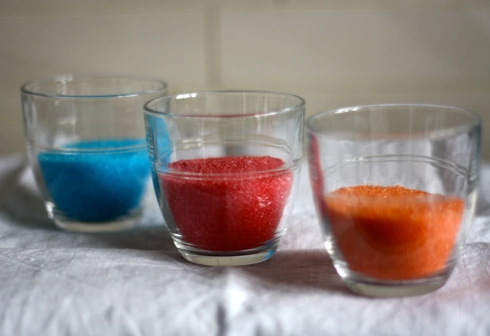
While I was reading through the Cake pops book last week I kept coming across ‘sanding sugar’ which I discovered was an American term for coloured sugar and guess what? It’s really, really easy to make yourself. This is what I wanted to decorate my bauble cookies with, but at this time of year there are so many uses for it I just had to share it with you.
How to make coloured sugar.
First of all sorry for the dark photos. This is what happens when I am working late at night in a very dark kitchen but HAVE to share this great tip with you right away!
Ingredients
Granulated sugar
food colour gels
cornflour
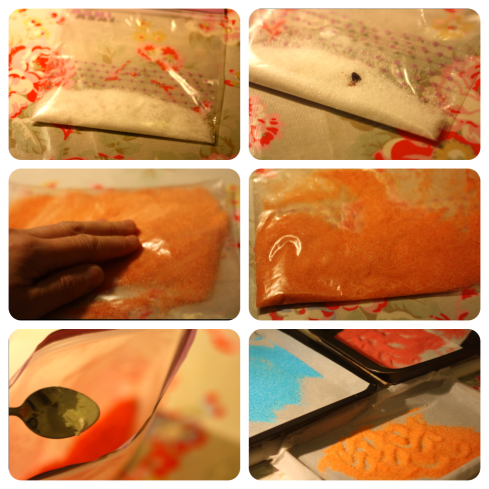
- Start by placing the granulated sugar into a strong sandwich bag. I’ve just discovered Ikea’s ones that are really tough and have a double seal.
- Using a toothpick place a small amount of food colouring gel (not liquid food colour or you’ll get a nasty mess) onto the sugar.
- Seal up the bag securely then gently rub the bag until all the sugar has taken the colour. Be careful not to rub too hard as sugar has sharp edges that can easily tear through the bag.
- Check that the colour is evenly distributed. Small darker patches won’t dry out so rub them in a little more. If you want the colour stronger or darker add more colouring and re-blend until it’s perfect.
- If the sugar becomes too damp add a little cornflour at a time and shake the bag thoroughly. Try not to add too much cornflour as it will take some of the shine off of the sugar crystals.
- Once the perfect colour has been achieved place the sugar on a baking tray lined with silicon paper and leave to dry out over night. Don’t let your 6 year old near it with her sticky fingers. Darcey said she hadn’t touched it but that definitely looks like Darcey shaped fingerprints in the orange sugar. Don’t you think?
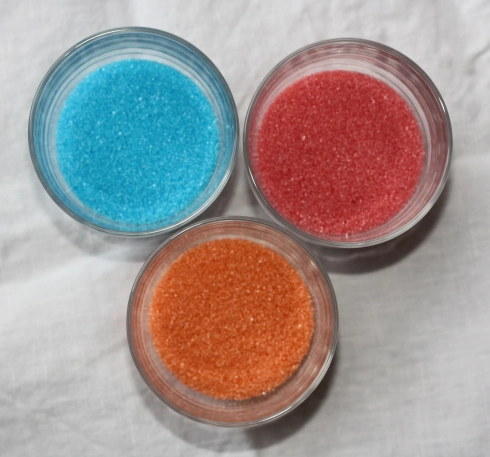
- Once it’s completely dry and doesn’t clump together when shaken store it in a very dry, air tight container till you’re ready to use it.
The great thing about this sugar is that you can make as much or as little or as many colours as you like. It’s much more cost effective than buying pre-coloured sugars and you can create the perfect colour palette. Where would you use it?
Enjoy!
More cake things you may like
How to make easy butterfly cookies that look fantastic!
FAQ: What size eggs should I use for baking?
FAQ: How to measure the volume of a cake tin?
FAQ: Frequently Asked Questions
How to make coloured sugar decorations


[…] to use all kinds of toppings. I made some with pre-bought sprinkles then started playing with the coloured sugar and decided that was the best and most uniformed […]