My first Christening cakes
I’ve been trying to be really organized this year (you know how those new year goals can be!) and I was sorting out all the photos on my PC. I realized how many cakes I made last year. It was a LOT! You don’t really realise how many you’ve done till you look back. So, I thought I would start sharing them with you.
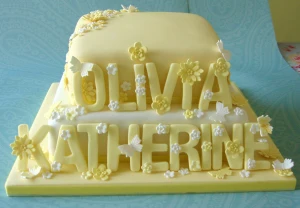
The first one
A few years ago, when I hadn’t ever really tried to stack a cake before, my mother in law’s best friend asked if I would make her grand-daughters Christening cake. Of course it was a pleasure, but it was also a little daunting. She was really sweet and just said
“I’d like a two tier cake with her name – Olivia Katherine, on it”
Great! I thought. This is my chance to stack a cake. Little did I realize that the name Katherine was going to be more of a challenge than the stacking.There are a lot of letters in her name so I had to think outside the box as it were! I decided to make the letters from sugar paste using cookie cutters two weeks before delivery so that they would have plenty of time to dry out. This enabled me to stand them up against the cake. IT also meant that the bottom tier had to be pretty big. I then made some flowers with flower press cutters and attached them to each letter.
In all stacking the cake wasn’t as hard as I thought it would be and the grandparents and family loved it. Even though Tim (my harshest critic) told me it was wonky!
Along came Molly
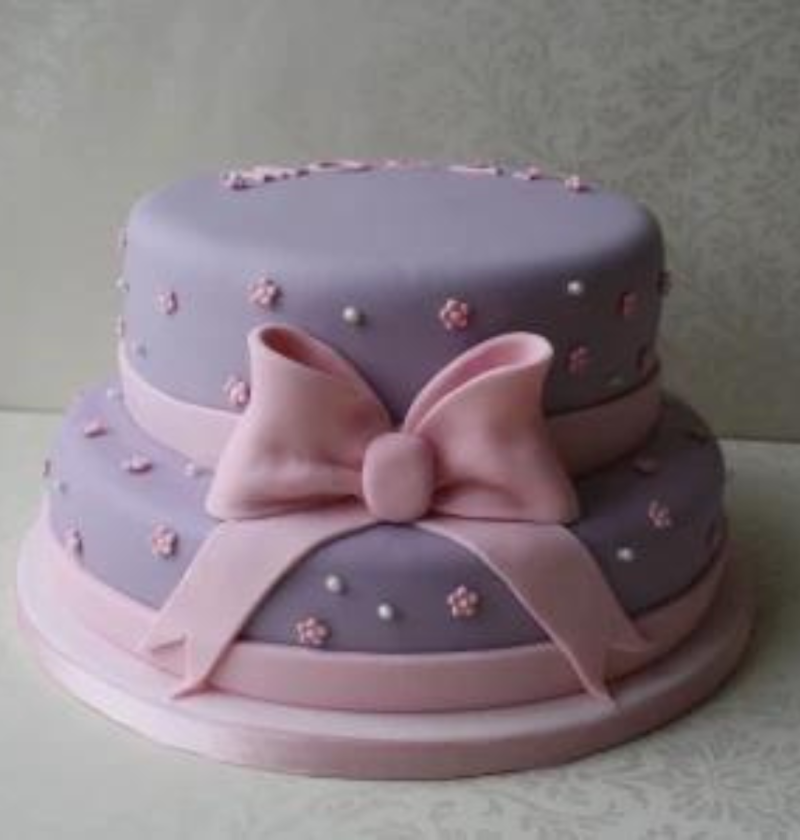
So….. a year and a half later along came Olivia Katherine’s little sister and I was again asked to make a two tier cake. This time I wasn’t so scared of the whole assembly thing. Molly’s cake was to be lilac with her name on. The rest was up to me (how cool is that for someone to trust you with your own designs for their cake?) I wanted it to be classy and pretty yet still young as it was for a christening.
The cake was Madeira and was stacked and covered in lilac icing. A week before I baked the cake I iced the cake board and made a huge bow from pink sugarpaste, then set them aside to dry.
I used my spacers to cut even lines from pink sugarpaste to form the ‘ribbon’ that went around each cake then positioned the bow at the front and made ties to hang down over the front.
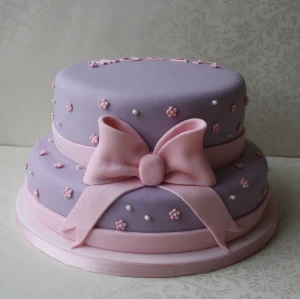
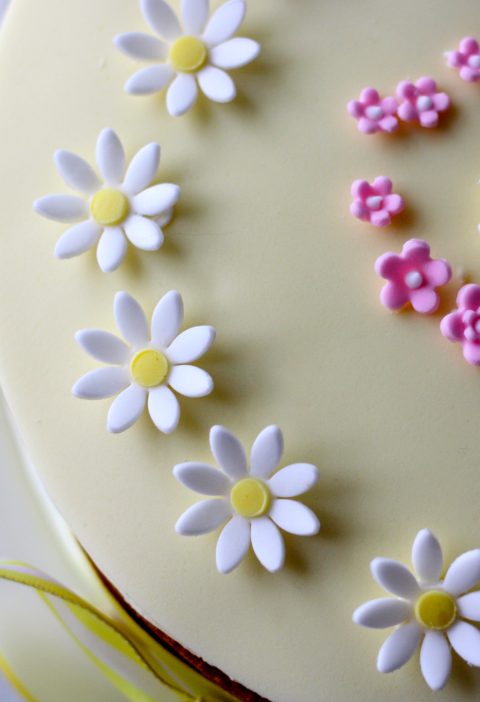
I finished it off with a scattering of pink blossom flowers and a few pearls dotted around the cake.
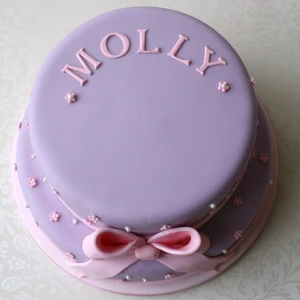
To make the ‘Molly’ I used tappits. These are so easy to use and look so neat and professional. All that was needed then was the real ribbon around the base of the cake board and it was time to deliver.
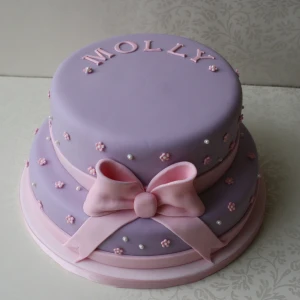
The cake was a big success. Let’s hope I get asked to make baby number three a christening cake (if there is a number three!) I’d love to make a boys christening cake.
Enjoy!
More Cakes you may enjoy

wow Emma, these are fantastic. It’s amazing what you can do when you are self taught. You should be really proud. Sophisticated and beautiful cakes.
Thank you. That’s really sweet of you to say.
Hello Emma,
Your cakes look great – I particularly like the upright letters.
I am decorating a cake for my daughter’s 11th birthday this weekend and she wants it to look like a big square present. I have only ever used ready-made royal icing as previous attempts to make my own were unsuccessful. Did you make yours? I need a couple of different colours and although you seem to be able to buy ready-made in bright colours it only comes in smallish packets (presumably for modelling rather than covering an entire cake). Also how do you make it so smooth without any noticeable pleats or joins.
Any suggestions gratefully received.
Kind regards,
Janine
Hello,
Thanks for your comment/question. I use sugar paste to cover my cakes, rather than royal icing . Royal icing is applied wet and is much trickier to get a smooth finish with -unless you are mega experienced which I’m not! Sugarpaste comes in 500g packs and costs around £1.25 a pack. It’s cheaper to buy in larger quantities of white sugarpaste and then use gel food colours to get the different colours you want.The wet food colouring you get in supermarkets makes the sugarpaste too sticky to use. Gel colours are available from cake decorating shops as are big blocks of the sugarpaste.
To get a smooth finish on my cakes I use a cake smoother but you can use the palm of your hand too. Icing is very forgiving as long as you roll it out quite thick to begin with. It took me ages to do this. I roll my sugarpaste to about 5mm thick before I lift it onto a cake. Lightly cover the cake in buttercream to make the icing stick. If your cake is square (which I am assuming a present shaped cake would be) lay the sugarpaste over the whole cake then smooth it down gently – just on the top – with the the palm of your hand. Then at each corner very gently lift the icing away from the cake where it meets the work surface with one hand and smooth down the icing from the top of the cake over the edge till you reach the bottom edge of the cake. Do this at each corner then go back and smooth down the sides. The trick is to pull the sugarpaste icing away from the cake very gently with one hand as you are smoothing it on to the cake with the other. The icing kind of stretches into place. If the icing is rolled out too thin it will tear so keep it quite thick to begin with.
You can gently rub any creases or joins with your hands till they disappear but failing that add something to disguise anything you aren’t happy with like dots all over the present or flowers. Sneaky tricks of the trade I think.
I hope this makes sense and helps. It’s hard to explain these things in words. I think I will have to write a post with pictures to explain what I mean in the not too distant future!
Good luck.
EmmaMT
X
Hello again,
Thanks very much for all your advice, which was a great help. There was some confusion when I asked for sugarpaste in some places and was directed to the cowgum; most places seem to call it Regalice. I managed to buy 1kg of white Tesco own brand ready to roll icing for £2.20 and some gel colours in Hobbycraft.
Anyway, it all went well and the result was quite good – if a bit Wallace and Gromit and lacking in the daintiness and finess of your cakes – but the guests were all impressed nonetheless.
Best wishes,
Janine
I’m so pleased it all went well. I’m in the process of setting up a Facebook page so everyone can post their masterpieces there (and I get to see them too!)
Regalice is the brand name of sugar paste. It all gets very confusing. I have no idea what cowgum is. Sounds intriguing! I’ll be googling that in a minute.
EmmaMT
X
That is beautiful!
Thanks sweetie.
Hi emma! Your cakes are fantastic, exactly what I’m wanting to do for my little girls christening! Basically I’m wanting to make a 2 tier white & pink one! With wee love hearts goin up round the side & on to the top with wee pink flowers & some butterflies its to match her balloons I bought her! Would fancy something like that of her name on the top thing is I can’t find a recipe for what I want! Don’t know what size of round cake tins to use or deep to have them! Or even what flavour or if I’m better havin different flavour for each tier! If possible could you please send me a cake recipe and cake tins size like yours you have shown & the depth, amounts & instructions etc as I’ve tried to google stuff but not getting exactly what I want! Need to know what the best recipe to cook & amounts! Don’t want to have a big big cake a nice one like yours pictured would be lovely! Just all confusing with amounts of ingredients to different size cake tins! If you have any help I’d appreciate it lots! Want my little girl to know I’ve tried this all for her!
Best wishes nikita xx
Hello,
Thanks for your comment. Your cake design sounds gorgeous.
The cakes that I made for Molly and Olivia are actually quite big, the base of Olivia’s was 12″.
I think the questions you are asking are what a lot of people may need to know, so I am going to write a few posts that answer all your questions and post them next week. I hope that gives you enough time. But in the mean time…
There is no right or wrong combination of cake flavour when having a few tiers, if anything the world is your oyster! I made a 4 tier wedding cake for my sister in law last year and each tier was a different flavour. It was a big success and everyone was happy. The bride and groom each had their favourite cake.
In my posts I will include how many servings you get with different size cakes so you can plan your daughters cake. I’ll also explain how much ingredients you need for each size tin. It took me ages to work that out!
Till then,
EmmaMT
Hello,
I just wanted to let you know that my last two posts should help you with your daughters christening cake.
Good luck
EmmaMT
Hi Emma
Amazing looking cake, really cute!
I’m making my daughters Christening cake in 2 weeks, using your Madeira recipe. The cake will be 10″ and I want to make 2″ toy blocks to sit on top of the cake using sugarpaste borders and stencil sugarpaste letters on each block to spell our her name.
I only need to make 4 blocks but I cant find any tins small enough. Should I use your smallest Madeira recipe in a square tin and then cut the cake into blocks. Ive never done this before so im excited and very scared at the thought of it.
And should I cover and decorate the blocks on the same day as the cake or a day before?
Please help 🙂
Thanks Cheryl
Hello,
That sounds like a fun cake to make. I think I would make a cake from the smallest square tin I had for the blocks then cut it into cubes. Ideally you would want a 4″ square tin but most people have a 6″ – you could always eat the little bit extra! I know I would.
There are cake tins on Amazon that you might want to invest in.
4″ Square cake tin on Amazon ” target=”_blank”>See this link
I try to cover a cake with buttercream and sugarpaste as soon as possible so the cake is sealed in and stays fresh. When making decorative items – like the blocks, I would make them first and cover them so that the bit that takes the longest is done. You might find it easier to bake the cakes a day before you want to decorate as cakes tend to be more crumbly when they are super fresh.
I hope this has helped. Let me know how you get on.
EmmaMT
x
Thanks for your reply Emma.
Ive just brought the 4″ tin – thanks for the link.
Im looking forward to making the cake but scared since its my first time doing anything like this!
Can I ask a few more questions please….
1. When I cover my cake board with sugarpaste and the cake – is it ok to leave out on the counter with just a loose cover over them or must they be in an airtight container? And how long before the event should I cover the board ?
2. I was about to buy Renshaw ready to roll pre-coloured icing to make small flowers and also for the borders of the blocks and letters thinking it will save time and a bit of money instead of having to buy seperate gels to colour white paste. The saleswoman told me not to use it for this as it wont set , she said Its for covering cakes only and that I need modeling paste which isnt edible but would dry rock hard- I thought sugarpaste/fondant would be ok for this as long as the flowers were quite small ?
3. I’m putting the main cake on a board the same size and then onto a board/drum that is 2″ bigger and covered in sugarpaste – should I cut out of the middle of the drum to sit the cake on or should I dab some buttercream onto the drum before placing the cake on its board onto it?
4. Finally (phew!)
The Blocks – these are really worrying me now – Im not sure actually how to cover them in fondant all the way round – I would normally cover just the top and sides of a cake , never underneath but now with these blocks which I thought woud be the easiest bit haha – I wondering how on earth I can do that without getting my finger marks all over it – what if I just cut out a square and add it underneath when the other sides are dry? and can I sit them directly onto the cake without them going soggy and making the cake soggy or do i need dowels/ boards. Im planing to have 3 of the blocks flat and one of them leaning on its corner – like its tumbled over.
Oh dear..Im sarting to think im in way over my head and the christening is next Sunday – 16th March (GULP!!)
My husbands told me to get down M&S haha thats how much confidence he has in me!!
Hope you can help and sorry for all the questions.
Thanks
Cheryl
I cover the cake board about a week before I make the cake. That way it has time to harden and when I start putting the cake on the board I don’t dent it or leave finger prints on it. I leave it on the top of my kitchen cupboards as it’s warm up there and won’t get knocked (I’ve got a very small kitchen!)
Once a cake is covered in sugarpaste I place it straight onto the cake board. That means the cake is sealed and doesn’t need putting in an airtight container.
I make pretty much all my flowers from sugarpaste. I like everything to be edible! Modeling paste and flower paste is like really hard sugarpaste and is easier to handle and mould because of that. It does get rock solid but you can use sugarpaste too. I would for this cake. Make the flowers a day or two before you want to add them to the cake, leave them in the open to dry out and they will be fine. I place mine on a piece of kitchen roll on a cutting board.
Cover the whole of the bottom cake board and leave it to dry then when you cover the cake cover it over the cake and the smaller board at the same time. To stick the cake to the cake board and the cake boards together use royal icing. Sugar is very sticky and dries quickly. Buttercream will make it slippy.
Right. The blocks! If I were you this is how I would make them. For the ones that sit flat on the cake just cover them as you would a square cake. You don’t need to have sugarpaste underneath as no-one is going to see it. It won’t make the cake go sogy. A bit of cake might come off when the cake is cut and the block is lifted up but by that point it’s about to be eaten anyway!
For the block that is leaning I would place that on a small cake board – the ones that look like thick cardboard covered in silver paper. You can cut these down with a scalpel to exactly the size you want. Stick your cake to the board with royal icing then cover the whole thing with sugarpaste. If you are going to see the underneath of the board on this block you can cover it with sugarpaste first and leave it to harden before you put the cake on the other side of it.
To position this leaning block place a small amount of royal icing on the cake where the base of the block is to sit and put it in place.
M&S cakes may look good but they won’t be anywhere near as good as yours.
I can’t tell you how many times I have been really scared to start a cake because I have no idea what I am doing. But 9 times out of 10 it’s the getting started that’s the hardest part. My best advice is to just ignore the nerves and do it…. and give yourself plenty of time. It ALWAYS takes longer than you expect.
I can’t wait to see it now!
Good luck and remember to have fun
EmmaMT
x
Hi Emma
Well…..it was a stressful week and I nearly launched the cake up the garden a few times but I persevered and learnt a lot on long the way and it turned out the be a huge success!! The guests at the christening actually thought I had brought the cake – I cannot believe it!! Its my first ever attempt at making a cake look pretty but I followed your advice and I feel very proud. Also lots of people text me afterwards to say its the best tasting Madeira theyve ever had so a huge thanks to you and your mum 🙂
Heres the problems I encountered along the way…
The cake blocks..oh my goodness!! Because they were 2″ x 2 “, I found them so hard to cover with sugarpaste, I just couldnt get sharp corners and the sides kept bubbling outwards. Do you think royal icing would have been better?
I found the spacers I used rolling out the for sugarpaste made it way too thick but trying to judge the thickness without them was very hard and I ended up with thick and thin.areas.
The borders for the blocks were the hardest part of all. I had drawn a template and then cut out 20 square borders for the blocks and let dry overnight – but that meant they were brittle and because the blocks wern’t square they just wuldnt fit and kept breaking.
I had to cut them out again and put on whilst still pliable. I then had to mix royal icing and try to colour match to the borders to fill in the gaps – it was like doing DIY haha.
I decided not to lean one of the blocks and instead just placed a letter on its side to give the impression it was the block…clever eh!
I used edible glue to stick a ribbon around the main cake to hide the cake board it was on and it looked nice exept that the glue showed through the ribbon in places.
I can send you a photo to see the end result..is there a link to do this?
I cannot thank you enough for your help and advice which gave me the confidence to really go for it. I am a complete novice and its made me want to bake again and try other ideas…perhaps shaped cakes next time or tiered ones!!
Well done you. That’s fantastic!!!
I’d love to see a photo. You can post one on the CakesBakesAndCookies Facebook page here if you like.
Great effort I’m sure
EmmaMT