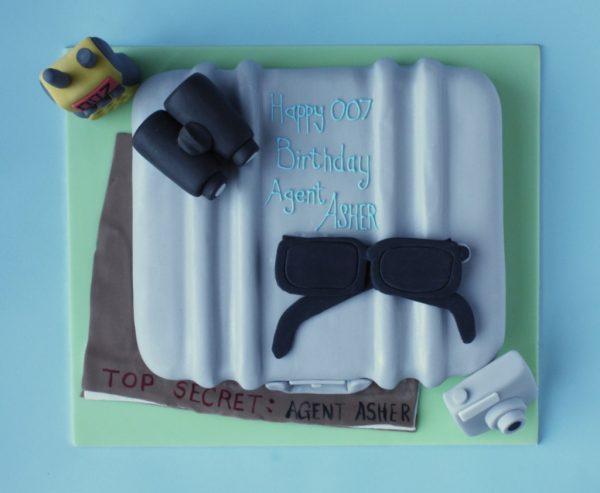
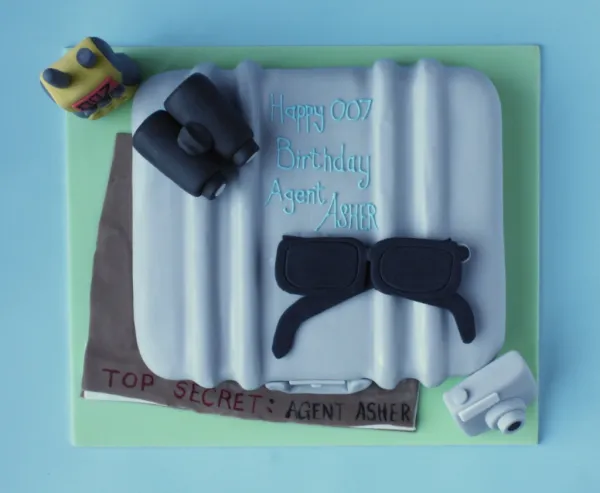
Agent Asher (aka the other little man in my life) was 7 in January. He and Darcey are mad on playing Spy games. Asher creates alarms that go off when you walk past a beam (YES! at 7!!) and Darcey has been practicing sneaking around, hiding, then jumping out on me to see if I knew she was there. She’s getting very good at it. So, it was no surprise that Asher asked for a spy cake for his birthday. Actually when I asked him what cake he wanted he said “A pair of spy sunglasses!” There isn’t a lot of cake in a pair of sunglasses and that’s where the suitcase idea came from.
The Sunglasses on the Spy cake
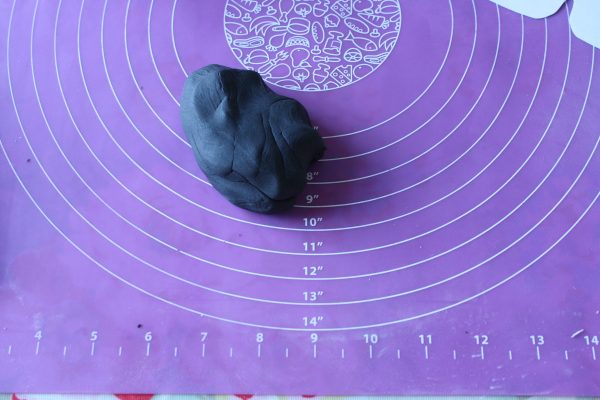
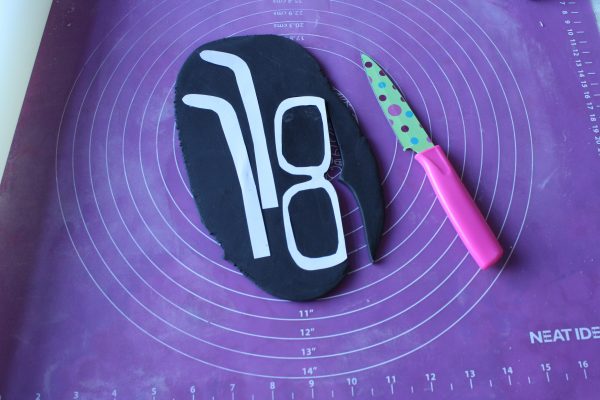
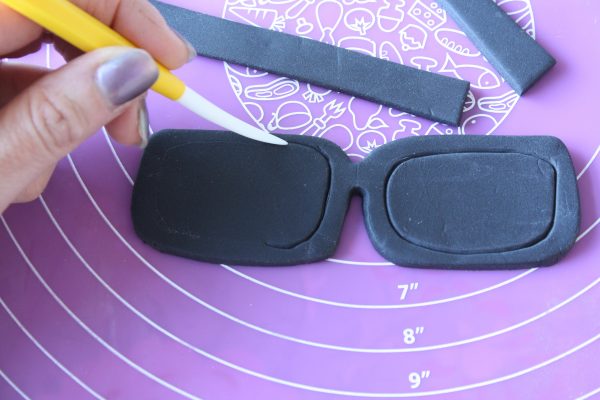
First I kneaded a little Tylo Powder into the black sugar paste. This makes it into a modelling paste so it will get harder quicker. I drew a template of sunglasses and then rolled out the sugar paste. I then carefully cut out around the shape. I used a sharp knife to do this and then marked the outline with a pointed tool. Then I cut out the arms of the sunglasses and placed all the pieces onto a piece of kitchen paper and left it to harden up over night but leaving it for 24 hours is better.
I wanted to position the glasses open onto of the cake but when it came doing that I fiddled with them so much I broke them! Next time I would make two pairs just in case and not fiddle so much!
The Walkie Talkie
I wanted the walkie talkie to be a bit brighter as I knew nearly everything on the cake was going to be either grey or black. I chose a yellow and red design randomly from a google search of what they look like and it turned out that I chose the exact model that Asher already had! Funny how that happens.
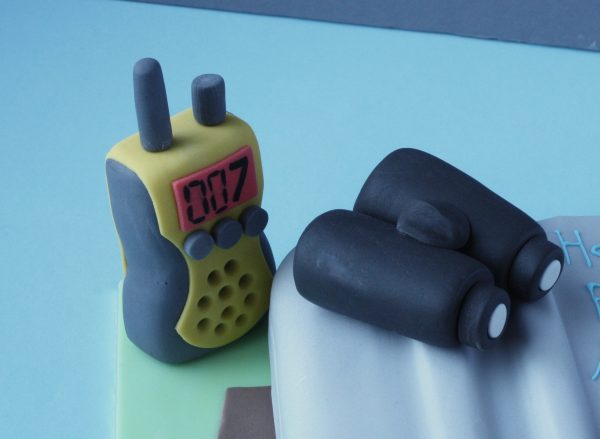
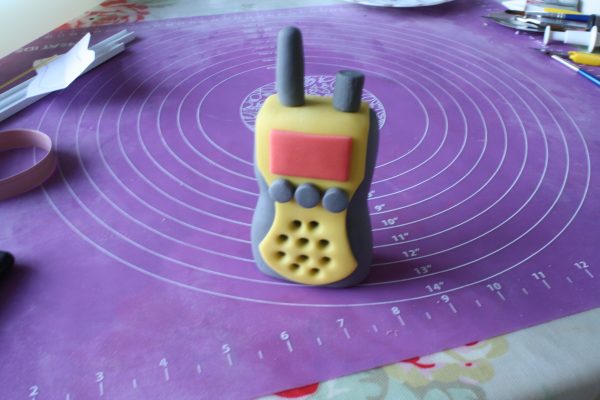
To make the walkie talkie I made a large rectangular cube and curved it in the middle. I then rolled out some yellow sugar paste and shaped it so it would fit over the top of the block. The grey knobs and dials were positioned on the top and front with a little edible glue and a small piece of spaghetti to keep them in position.
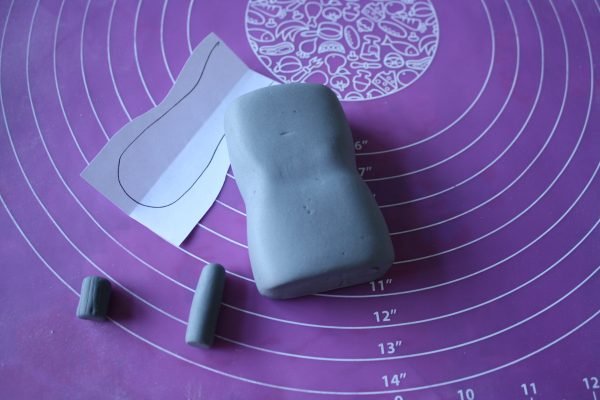
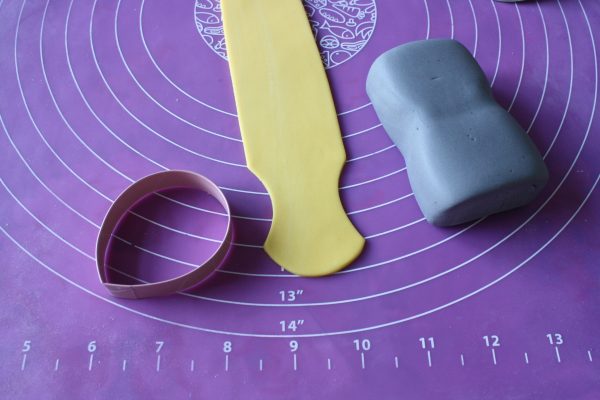
The dials were added to the front with the red info panel using edible glue then I used a bulbous cone tool to make holes for the speaker area. I painted the 007 onto the panel with black food colour then left the whole thing to harden up.
The Camera and binoculars
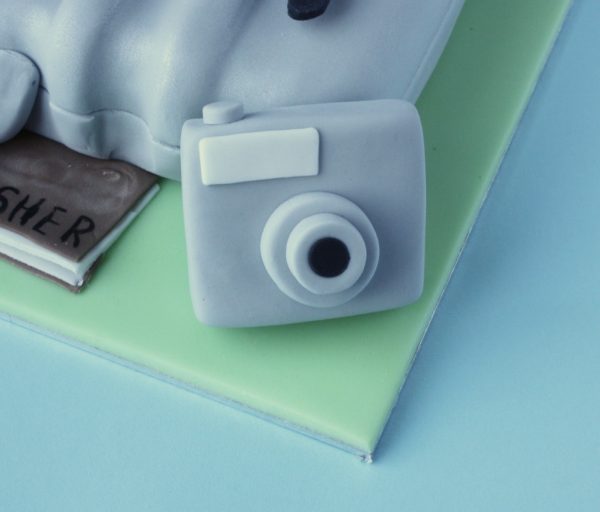
The camera was pretty easy to make. It’s just some flat cylinder shapes glued onto of a rectangular cube.

The binoculars took a long time to dry out as there was so much thick sugar paste in them. I wish I had made them a week earlier so they could have dried up a bit more.
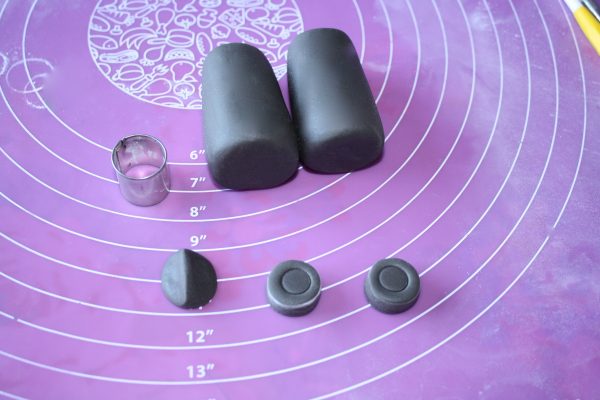
I rolled out two long cylinders which I tapered slightly at one end. I then made two smaller cylinders for the eye holes. I used a circle cutter to imprint circles on the ends then cut out thin white circles and placed these over the ends and stuck these onto the narrow end of the binoculars. To hold the binoculars together (or at least to give that illusion) I rolled out a ball and then squished it between my fingers so there was a pointed line down the centre. I then turned this over and repeated on the other side. I then sat it between the two long cylinders. It was then left to harden up a bit.
How to make a suitcase cake
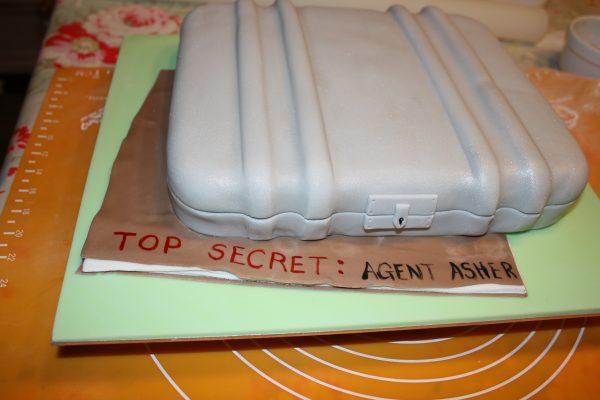
The actual cake was only for around 10-15 kids so I made a flat-ish Madeira cake and didn’t fill it with buttercream as I wanted it to stay flat so it looked like a briefcase rather than a suitcase. I covered it how my mum covers her Madeira cakes – with raspberry jam and then marzipan followed by sugar paste. This is without a doubt the most delicious combo! What’s more we all love marzipan so the four thick strips which were placed over the cake to give the case some shape were always going to go down well.
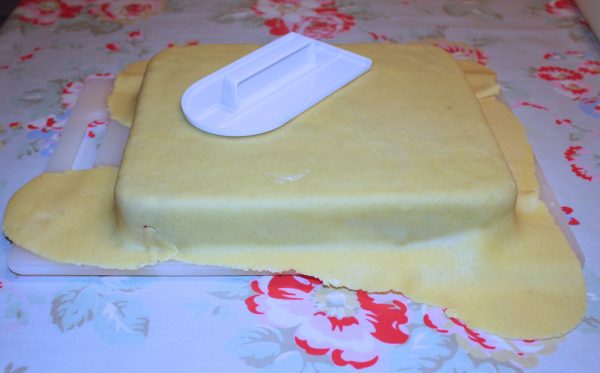
The whole cake was covered in grey sugar paste and the shape was flattened and smoothed by hand which was quite tricky to get completely smooth with the ridges in the way!
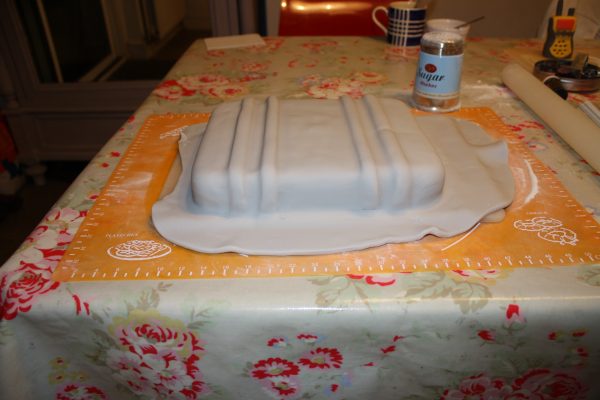
To make the spy case look like metal I covered the whole cake with metallic lustre. I placed a piece of kitchen paper over the cake board as I moved around the cake with a soft paint brush as that stuff is so fine and powdery it gets everywhere.
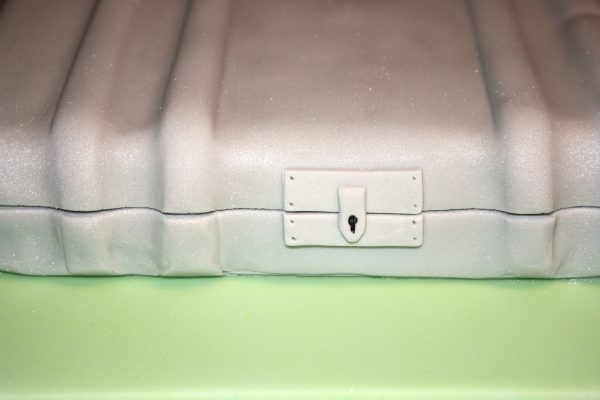
I made a lock for the front with two rectangles and a small latch then poked holes for rivets at each corner. I painted the rivets and lock black.
The Top secret files
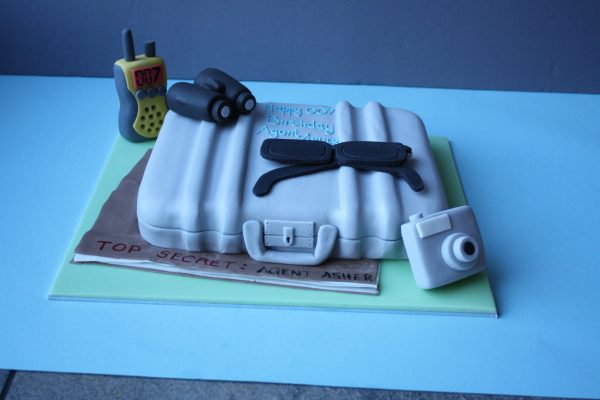
The ‘TOP SECRET’ files were cut out of layers of white modelling paste which I made as thin as I possibly could without them tearing. I cut them into a backwards ‘L’ shape that would slot right up against the cake and look like it was sitting underneath the cake. I did a test run with a piece of paper first to get the angles right. I layered the pages up then covered them with a thin brown modelling paste. I used a thin paint brush and edible food colours to paint on the words “TOP SECRET: AGENT ASHER” then positioned the file on the cake board- sticking into place with edible glue.
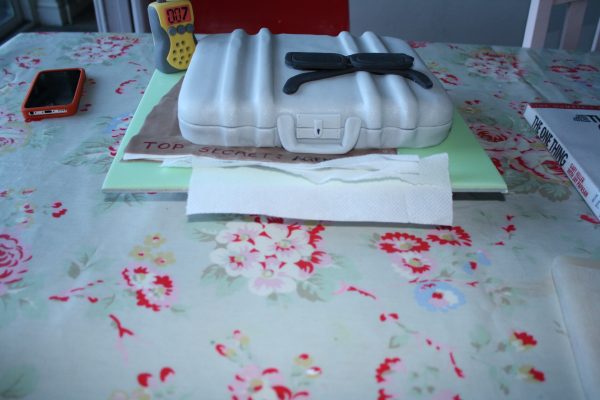
To give the pages a bit of a ruffled look I placed folded pieces of kitchen paper in between each page and left them to harden.
Once the file was in place the handle was added to the front of the case. Edible food glue was used to stick it in position.
The finished Spy cake

To finish off I positioned all the elements on the cake. I used a little royal icing to keep them all in place and piped the birthday message on the top.

I was pretty happy with this cake. I didn’t like the fact that my little nephew had an almost grey cake as if feels wrong for a bubbly seven year old not to have something with a bit more colour but I think he was thrilled with it. I didn’t tell him what I was doing so he thought he was just getting sunglasses! I think Agent Asher was happy with the result.
My sister Shelley put on a fantastic spy party with tons and tons of spy games – including an obstacle course with laser beams – of course! so I think the cake was just right!
EmmaMT
x
More Kids Birthday Cakes you may enjoy
How to make a merry go rounds birthday cake
How to make Beau’s sleepover cake
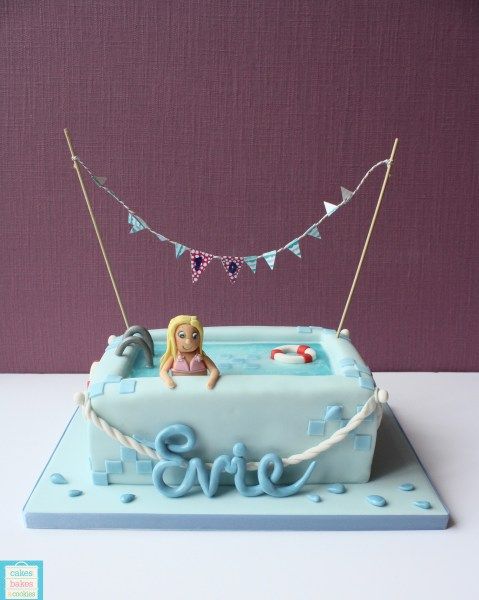
How To Make A Swimming Pool Cake
How to make a Mario and Yoshie Birthday Cake

What a clever idea! I love this.
Emma you are a cake genius, love it.
Can u Please please email me the fondant recipe.